Prerequisite Knowledge for the Reactivity System
Developer interface we aim for this time
From here, we will talk about the essence of Vue.js, which is the Reactivity System.

This is the heart of Vue.js!
Once you understand the Reactivity System, you'll understand Vue.js's "magic".
It's a bit challenging, but let's tackle it together!
The previous implementation, although it looks similar to Vue.js, is not actually Vue.js in terms of functionality.
I simply implemented the initial developer interface and made it possible to display various HTML.
However, as it is, once the screen is rendered, it remains the same, and as a web application, it becomes just a static site.
From now on, we will add state to create a richer UI, and update the rendering when the state changes.
First, let's think about what kind of developer interface it will be, as usual.
How about something like this?
import { createApp, h, reactive } from 'chibivue'

const app = createApp({
  setup() {
    const state = reactive({ count: 0 })

    const increment = () => {
      state.count++
    }

    return () =>
      h('div', { id: 'my-app' }, [
        h('p', {}, [`count: ${state.count}`]),
        h('button', { onClick: increment }, ['increment']),
      ])
  },
})

app.mount('#app')
If you are used to developing with Single File Components (SFC), this may look a little unfamiliar.
This is a developer interface that uses the setup option to hold state and return a render function.
In fact, Vue.js has such notation.
https://vuejs.org/api/composition-api-setup.html#usage-with-render-functions
We define the state with the reactive function, implement a function called increment that modifies it, and bind it to the click event of the button.
To summarize what we want to do:
- Execute the
setupfunction to obtain a function for obtaining the vnode from the return value - Make the object passed to the
reactivefunction reactive - When the button is clicked, the state is updated
- Track the state updates, re-execute the render function, and redraw the screen
What is the Reactivity System?
Now, let's review what reactivity is.
Let's refer to the official documentation.
Reactive objects are JavaScript proxies that behave like normal objects. The difference is that Vue can track property access and changes on reactive objects.
One of Vue's most distinctive features is its modest Reactivity System. The state of a component is composed of reactive JavaScript objects. When the state changes, the view is updated.
In summary, "reactive objects update the screen when there are changes".
Let's put aside how to achieve this for now and implement the developer interface mentioned earlier.
Implementation of the setup function
What we need to do is very simple.
We receive the setup option and execute it, and then we can use it just like the previous render option.
Edit ~/packages/runtime-core/componentOptions.ts:
export type ComponentOptions = {
  render?: Function
  setup?: () => Function // Added
}
Then use it:
// createAppAPI

const app: App = {
  mount(rootContainer: HostElement) {
    const componentRender = rootComponent.setup!()

    const updateComponent = () => {
      const vnode = componentRender()
      render(vnode, rootContainer)
    }

    updateComponent()
  },
}// playground
import { createApp, h } from 'chibivue'
const app = createApp({
setup() {
// Define state here in the future
// const state = reactive({ count: 0 })
return function render() {
return h('div', { id: 'my-app' }, [
h('p', { style: 'color: red; font-weight: bold;' }, ['Hello world.']),
h(
'button',
{
onClick() {
alert('Hello world!')
},
},
['click me!'],
),
])
}
},
})
app.mount('#app')Well, that's it.
Actually, we want to execute this updateComponent when the state is changed.
Proxy Objects
This is the main theme for this time. I want to execute updateComponent when the state is changed somehow.
The key to this is an object called Proxy.

Proxy is a standard JavaScript feature, not something Vue.js invented.
Think of it as "a mechanism to monitor and customize access to objects"!
With this, we can detect when "a value was read" or "a value was changed".
First, let me explain about each of them, not about the implementation method of the Reactivity System.
https://developer.mozilla.org/ja/docs/Web/JavaScript/Reference/Global_Objects/Proxy
Proxy is a very interesting object.
You can use it by passing an object as an argument and using new like this:
const o = new Proxy({ value: 1 }, {})
console.log(o.value) // 1
In this example, o behaves almost the same as a normal object.
Now, what's interesting is that Proxy can take a second argument and register a handler. This handler is a handler for object operations. Please take a look at the following example:
const o = new Proxy(
  { value: 1, value2: 2 },

  {
    get(target, key, receiver) {
      console.log(`target:${target}, key: ${key}`)
      return target[key]
    },
  },
)
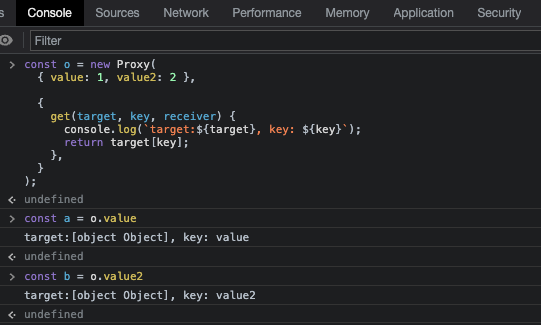
In this example, we are writing settings for the generated object. Specifically, when accessing (get) the properties of this object, the original object (target) and the accessed key name will be output to the console. Let's check the operation in a browser or something.

You can see that the set processing set for reading the value from the property of the object generated by this Proxy is being executed.
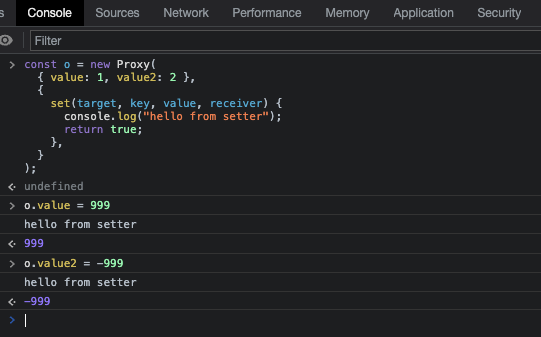
Similarly, you can also set it for set.
const o = new Proxy(
  { value: 1, value2: 2 },
  {
    set(target, key, value, receiver) {
      console.log('hello from setter')
      target[key] = value
      return true
    },
  },
)

We can detect "reads" with get and "writes" with set...
So if we call "screen update logic" at set timing, we achieve the magic of automatic screen updates when values change!
This is the extent of understanding Proxy.
