Data Binding
Want to bind to the template
Currently, we are directly manipulating the DOM, so we are not able to take advantage of the Reactivity System or Virtual DOM.
In reality, we want to write event handlers and text content in the template section. That's where the joy of declarative UI comes in.
We aim for a developer interface like the following.
import { createApp, reactive, h } from 'chibivue'

const app = createApp({
  setup() {
    const state = reactive({ message: 'Hello, chibivue!' })
    const changeMessage = () => {
      state.message += '!'
    }

    return { state, changeMessage }
  },

  render() {
    return h('div', { class: 'container', style: 'text-align: center' }, [
      h('h2', {}, `message: ${this.state.message}`),
      h('img', {
        width: '150px',
        src: 'https://upload.wikimedia.org/wikipedia/commons/thumb/9/95/Vue.js_Logo_2.svg/1200px-Vue.js_Logo_2.svg.png',
      }),
      h('p', {}, [h('b', {}, 'chibivue'), ' is the minimal Vue.js']),
      h('button', { onclick: this.changeMessage }, 'click me!'),
      h(
        'style',
        {},
        `
        .container {
          height: 100vh;
          padding: 16px;
          background-color: #becdbe;
          color: #2c3e50;
        }
      `,
      ),
    ])
  },
})

app.mount('#app')
Now, I want to be able to handle the values returned from the setup function in the template.
From now on, I will refer to this as "template binding" or simply "binding".
I am going to implement the binding, but before implementing event handlers and mustache syntax, there are a few things I want to do.
I mentioned the value returned from setup, but currently the return value of setup is either undefined or a function (render function).
As a preparation for implementing binding, I need to modify it so that setup can return state and other values, and these values can be stored as component data.
export type ComponentOptions = {
  setup?: (
    props: Record<string, any>,
    ctx: { emit: (event: string, ...args: any[]) => void },
  ) => Function | Record<string, unknown> | void
  // Allow returning Record<string, unknown>
  // .
  // .
  // .
}export interface ComponentInternalInstance {
// .
// .
// .
setupState: Data // Store the result of setup as an object here
}export const setupComponent = (instance: ComponentInternalInstance) => {
const { props } = instance.vnode
initProps(instance, props)
const component = instance.type as Component
if (component.setup) {
const setupResult = component.setup(instance.props, {
emit: instance.emit,
}) as InternalRenderFunction
// Branch based on the type of setupResult
if (typeof setupResult === 'function') {
instance.render = setupResult
} else if (typeof setupResult === 'object' && setupResult !== null) {
instance.setupState = setupResult
} else {
// do nothing
}
}
// .
// .
// .
}From now on, I will refer to the data defined in setup as setupState.
Now, before implementing the compiler, let's think about how to bind setupState to the template.
Previously, we bound setupState like this:
const app = createApp({
  setup() {
    const state = reactive({ message: 'hello' })
    return () => h('div', {}, [state.message])
  },
})
Well, it's not really binding, but rather the render function simply forms a closure and references the variable.
However, this time, since the setup option and the render function are conceptually different, we need to find a way to pass the setup data to the render function.
const app = createApp({
  setup() {
    const state = reactive({ message: 'hello' })
    return { state }
  },

  // This will be converted to a render function
  template: '<div>{{ state.message }}</div>',
})
The template is compiled as a render function using the h function and assigned to instance.render.
So, it is equivalent to the following code:
const app = createApp({
  setup() {
    const state = reactive({ message: 'hello' })
    return { state }
  },

  render() {
    return h('div', {}, [state.message])
  },
})
Naturally, the variable state is not defined within the render function.
Now, how can we reference the state variable?
Using the with statement
In conclusion, we can use the with statement to achieve the desired result:
const app = createApp({
  setup() {
    const state = reactive({ message: 'hello' })
    return { state }
  },

  render(ctx) {
    with (ctx) {
      return h('div', {}, [state.message])
    }
  },
})
I believe that there are many people who are not familiar with the with statement.
And for good reason, this feature is deprecated.
According to MDN:
Although still supported by some browsers, it has been deprecated from the Web standards. However, it may still be in use for various purposes, such as compatibility with legacy code. Avoid using it, and update existing code if possible.
Therefore, it is recommended to avoid using it.
We do not know how the implementation of Vue.js will change in the future, but since Vue.js 3 uses the with statement, we will use it for this implementation.
A little side note, not everything in Vue.js is implemented using the with statement.
When dealing with templates in Single File Components (SFC), it is implemented without using the with statement.
We will cover this in a later chapter, but for now, let's consider implementing it using with.
Now, let's review the behavior of the with statement. The with statement extends the scope chain for a statement.
It behaves as follows:
const obj = { a: 1, b: 2 }

with (obj) {
  console.log(a, b) // 1, 2
}
By passing the parent object that contains the state as an argument to with, we can reference the state variable.
In this case, we will treat setupState as the parent object.
In reality, not only setupState, but also data from props and data defined in Options API should be accessible.
However, for now, we will only consider using the data from setupState. (We will cover the implementation of this part in a later section, as it is not part of the minimal implementation.)
To summarize what we want to achieve this time, we want to compile the following template:
<div>
  <p>{{ state.message }}</p>
  <button @click="changeMessage">click me</button>
</div>
into the following function:
_ctx => {
  with (_ctx) {
    return h('div', {}, [
      h('p', {}, [state.message]),
      h('button', { onClick: changeMessage }, ['click me']),
    ])
  }
}
And pass setupState to this function:
const setupState = setup()
render(setupState)
Implementing the Mustache Syntax
First, let's implement the Mustache syntax.
As usual, we will consider the AST, implement the parser, and then implement the code generator.
Currently, the only nodes defined as part of the AST are Element, Text, and Attribute.
Since we want to define the Mustache syntax, it intuitively makes sense to have an AST called Mustache.
For that purpose, we will use the Interpolation node.
Interpolation has meanings such as "interpolation" or "insertion".
Therefore, the AST we will handle this time will look like this:
export const enum NodeTypes {
  ELEMENT,
  TEXT,
  INTERPOLATION, // Added
}

export type TemplateChildNode = ElementNode | TextNode | InterpolationNode // Added InterpolationNode

export interface InterpolationNode extends Node {
  type: NodeTypes.INTERPOLATION
  content: string // The content written inside the Mustache (in this case, the single variable name defined in setup will be placed here)
}
Now that the AST has been implemented, let's move on to implementing the parser.
When we find the string {{, we will parse it as an Interpolation.
function parseChildren(
  context: ParserContext,
  ancestors: ElementNode[]
): TemplateChildNode[] {
  const nodes: TemplateChildNode[] = [];

  while (!isEnd(context, ancestors)) {
    const s = context.source;
    let node: TemplateChildNode | undefined = undefined;

    if (startsWith(s, "{{")) { // Here
      node = parseInterpolation(context);
    } else if (s[0] === "<") {
      if (/[a-z]/i.test(s[1])) {
        node = parseElement(context, ancestors);
      }
    }
    // .
    // .
    //
}function parseInterpolation(
context: ParserContext,
): InterpolationNode | undefined {
const [open, close] = ['{{', '}}']
const closeIndex = context.source.indexOf(close, open.length)
if (closeIndex === -1) return undefined
const start = getCursor(context)
advanceBy(context, open.length)
const innerStart = getCursor(context)
const innerEnd = getCursor(context)
const rawContentLength = closeIndex - open.length
const rawContent = context.source.slice(0, rawContentLength)
const preTrimContent = parseTextData(context, rawContentLength)
const content = preTrimContent.trim()
const startOffset = preTrimContent.indexOf(content)
if (startOffset > 0) {
advancePositionWithMutation(innerStart, rawContent, startOffset)
}
const endOffset =
rawContentLength - (preTrimContent.length - content.length - startOffset)
advancePositionWithMutation(innerEnd, rawContent, endOffset)
advanceBy(context, close.length)
return {
type: NodeTypes.INTERPOLATION,
content,
loc: getSelection(context, start),
}
}There are cases where {{ appears in the text, so we will make some modifications to parseText.
function parseText(context: ParserContext): TextNode {
  const endTokens = ['<', '{{'] // If <span v-pre>`{{`</span> appears, parseText ends

  let endIndex = context.source.length

  for (let i = 0; i < endTokens.length; i++) {
    const index = context.source.indexOf(endTokens[i], 1)
    if (index !== -1 && endIndex > index) {
      endIndex = index
    }
  }

  const start = getCursor(context)
  const content = parseTextData(context, endIndex)

  return {
    type: NodeTypes.TEXT,
    content,
    loc: getSelection(context, start),
  }
}
For those who have implemented the parser so far, there should be no particularly difficult parts.
It simply searches for {{ and reads until }} comes, generating an AST.
If }} is not found, it returns undefined and parses it as text in the branching of parseText.
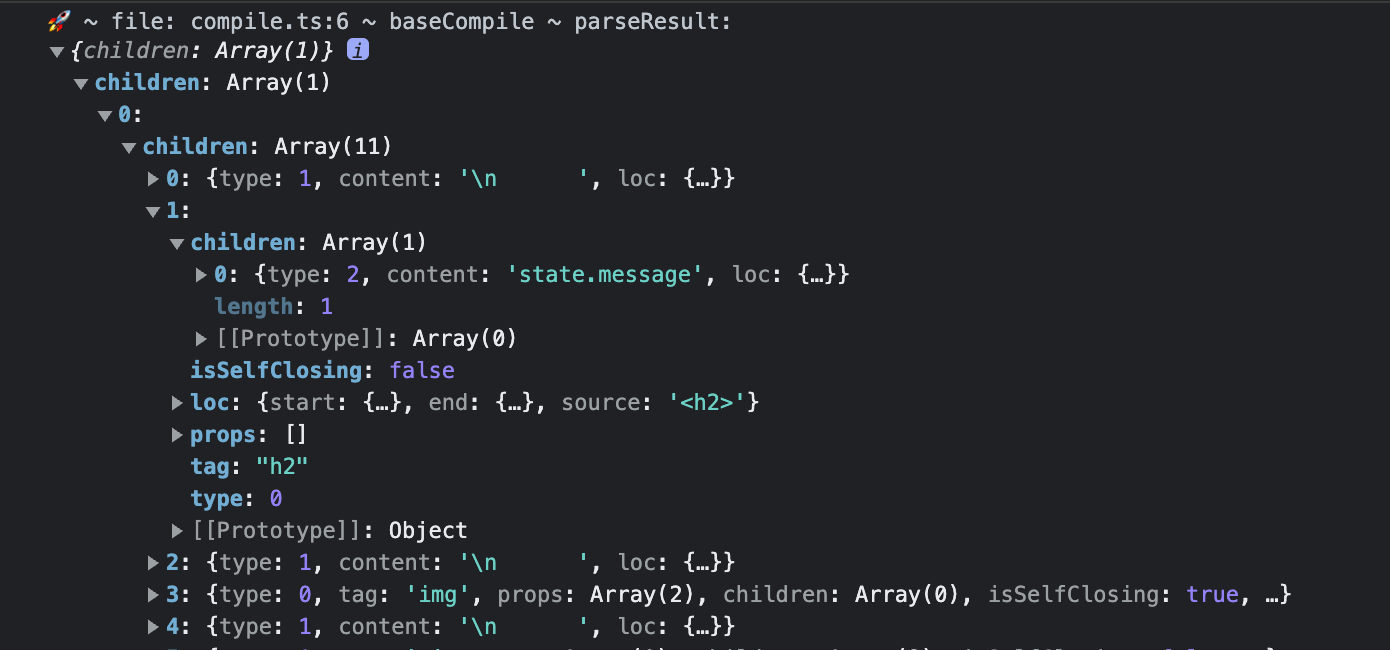
Let's output to the console or something to make sure that the parsing is working properly.
const app = createApp({
  setup() {
    const state = reactive({ message: 'Hello, chibivue!' })
    const changeMessage = () => {
      state.message += '!'
    }

    return { state, changeMessage }
  },
  template: `
    <div class="container" style="text-align: center">
      <h2>{{ state.message }}</h2>
      <img
        width="150px"
        src="https://upload.wikimedia.org/wikipedia/commons/thumb/9/95/Vue.js_Logo_2.svg/1200px-Vue.js_Logo_2.svg.png"
        alt="Vue.js Logo"
      />
      <p><b>chibivue</b> is the minimal Vue.js</p>

      <button> click me! </button>

      <style>
        .container {
          height: 100vh;
          padding: 16px;
          background-color: #becdbe;
          color: #2c3e50;
        }
      </style>
    </div>
  `,
})
It looks fine!
Now let's implement the binding based on this AST.
Wrap the contents of the render function with a with statement.
export const generate = ({
  children,
}: {
  children: TemplateChildNode[]
}): string => {
  return `return function render(_ctx) {
  with (_ctx) {
    const { h } = ChibiVue;
    return ${genNode(children[0])};
  }
}`
}

const genNode = (node: TemplateChildNode): string => {
  switch (node.type) {
    // .
    // .
    case NodeTypes.INTERPOLATION:
      return genInterpolation(node)
    // .
    // .
  }
}

const genInterpolation = (node: InterpolationNode): string => {
  return `${node.content}`
}
Finally, when executing the render function, pass setupState as an argument.\
~/packages/runtime-core/component.ts
export type InternalRenderFunction = {
  (ctx: Data): VNodeChild // Accept ctx as an argument
}
~/packages/runtime-core/renderer.ts
const setupRenderEffect = (
  instance: ComponentInternalInstance,
  initialVNode: VNode,
  container: RendererElement,
) => {
  const componentUpdateFn = () => {
    const { render, setupState } = instance
    if (!instance.isMounted) {
      // .
      // .
      // .
      const subTree = (instance.subTree = normalizeVNode(render(setupState))) // Pass setupState
      // .
      // .
      // .
    } else {
      // .
      // .
      // .
      const nextTree = normalizeVNode(render(setupState)) // Pass setupState
      // .
      // .
      // .
    }
  }
}
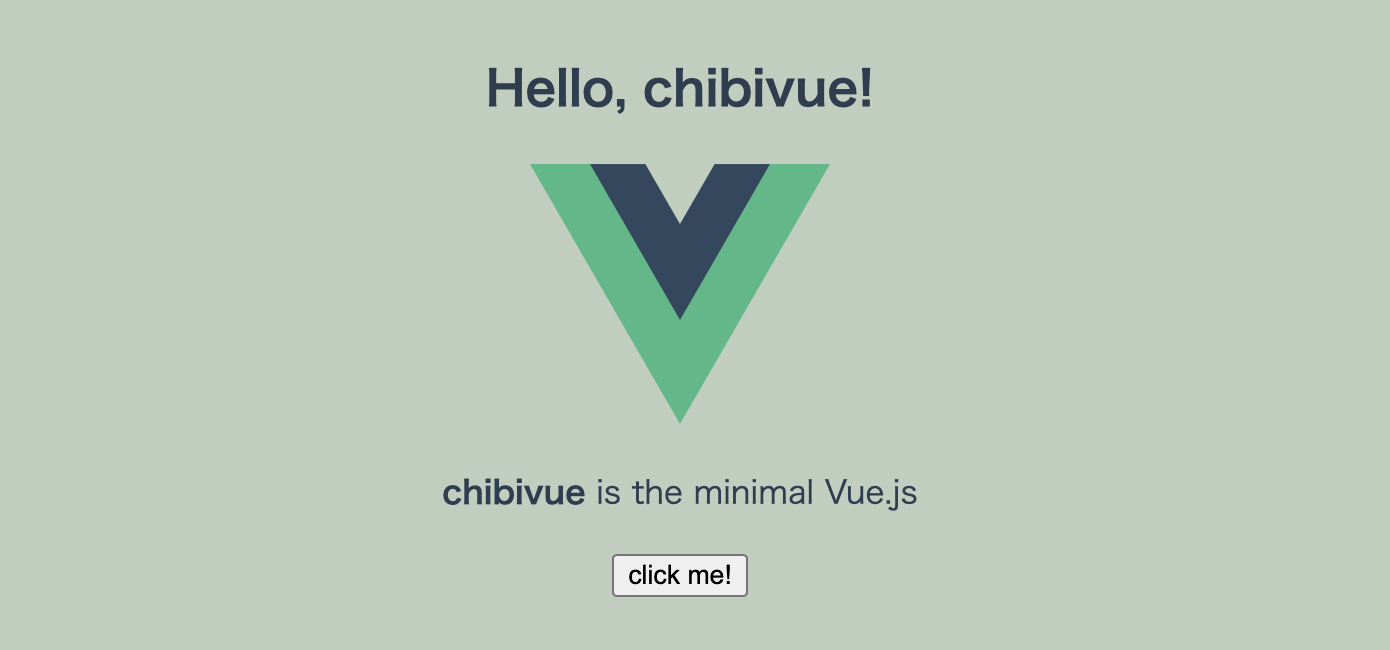
If you have come this far, you should be able to render. Let's check it!

This completes the first binding!
First Directive
Next is the event handler.
const genElement = (el: ElementNode): string => {
  return `h("${el.tag}", {${el.props
    .map(({ name, value }) =>
      // Convert props name to onClick if it is @click
      name === '@click'
        ? `onClick: ${value?.content}`
        : `${name}: "${value?.content}"`,
    )
    .join(', ')}}, [${el.children.map(it => genNode(it)).join(', ')}])`
}
Let's check the operation.
const app = createApp({
  setup() {
    const state = reactive({ message: 'Hello, chibivue!' })
    const changeMessage = () => {
      state.message += '!'
    }

    return { state, changeMessage }
  },
  template: `
    <div class="container" style="text-align: center">
      <h2>{{ state.message }}</h2>
      <img
        width="150px"
        src="https://upload.wikimedia.org/wikipedia/commons/thumb/9/95/Vue.js_Logo_2.svg/1200px-Vue.js_Logo_2.svg.png"
        alt="Vue.js Logo"
      />
      <p><b>chibivue</b> is the minimal Vue.js</p>

      <button @click="changeMessage"> click me! </button>

      <style>
        .container {
          height: 100vh;
          padding: 16px;
          background-color: #becdbe;
          color: #2c3e50;
        }
      </style>
    </div>
  `,
})
You did it! Well done! It's complete!
I want to say that, but the implementation is not clean enough, so I think I'll refactor it a bit.
Since @click is classified under the name "directive", it would be easy to imagine implementing v-bind and v-model in the future.
So let's represent it as DIRECTIVE in the AST and distinguish it from simple ATTRIBUTE.
As usual, let's implement it in the order of AST -> parse -> codegen.
export const enum NodeTypes {
  ELEMENT,
  TEXT,
  INTERPOLATION,

  ATTRIBUTE,
  DIRECTIVE, // added
}

export interface ElementNode extends Node {
  type: NodeTypes.ELEMENT
  tag: string
  props: Array<AttributeNode | DirectiveNode> // props is an array of AttributeNode and DirectiveNode union
  // .
  // .
}

export interface DirectiveNode extends Node {
  type: NodeTypes.DIRECTIVE
  // Represents the format of `v-name:arg="exp"`.
  // eg. For `v-on:click="increment"`, it would be { name: "on", arg: "click", exp="increment" }
  name: string
  arg: string
  exp: string
}function parseAttribute(
context: ParserContext,
nameSet: Set<string>
): AttributeNode | DirectiveNode {
// Name.
const start = getCursor(context);
const match = /^[^\t\r\n\f />][^\t\r\n\f />=]*/.exec(context.source)!;
const name = match[0];
nameSet.add(name);
advanceBy(context, name.length);
// Value
let value: AttributeValue = undefined;
if (/^[\t\r\n\f ]*=/.test(context.source)) {
advanceSpaces(context);
advanceBy(context, 1);
advanceSpaces(context);
value = parseAttributeValue(context);
}
// --------------------------------------------------- From here
// directive
const loc = getSelection(context, start);
if (/^(v-[A-Za-z0-9-]|@)/.test(name)) {
const match =
/(?:^v-([a-z0-9-]+))?(?:(?::|^\.|^@|^#)(\[[^\]]+\]|[^\.]+))?(.+)?$/i.exec(
name
)!;
let dirName = match[1] || (startsWith(name, "@") ? "on" : "");
let arg = "";
if (match[2]) arg = match[2];
return {
type: NodeTypes.DIRECTIVE,
name: dirName,
exp: value?.content ?? "",
loc,
arg,
};
}
// --------------------------------------------------- To here
// .
// .
// .const genElement = (el: ElementNode): string => {
return `h("${el.tag}", {${el.props
.map(prop => genProp(prop))
.join(', ')}}, [${el.children.map(it => genNode(it)).join(', ')}])`
}
const genProp = (prop: AttributeNode | DirectiveNode): string => {
switch (prop.type) {
case NodeTypes.ATTRIBUTE:
return `${prop.name}: "${prop.value?.content}"`
case NodeTypes.DIRECTIVE: {
switch (prop.name) {
case 'on':
return `${toHandlerKey(prop.arg)}: ${prop.exp}`
default:
// TODO: other directives
throw new Error(`unexpected directive name. got "${prop.name}"`)
}
}
default:
throw new Error(`unexpected prop type.`)
}
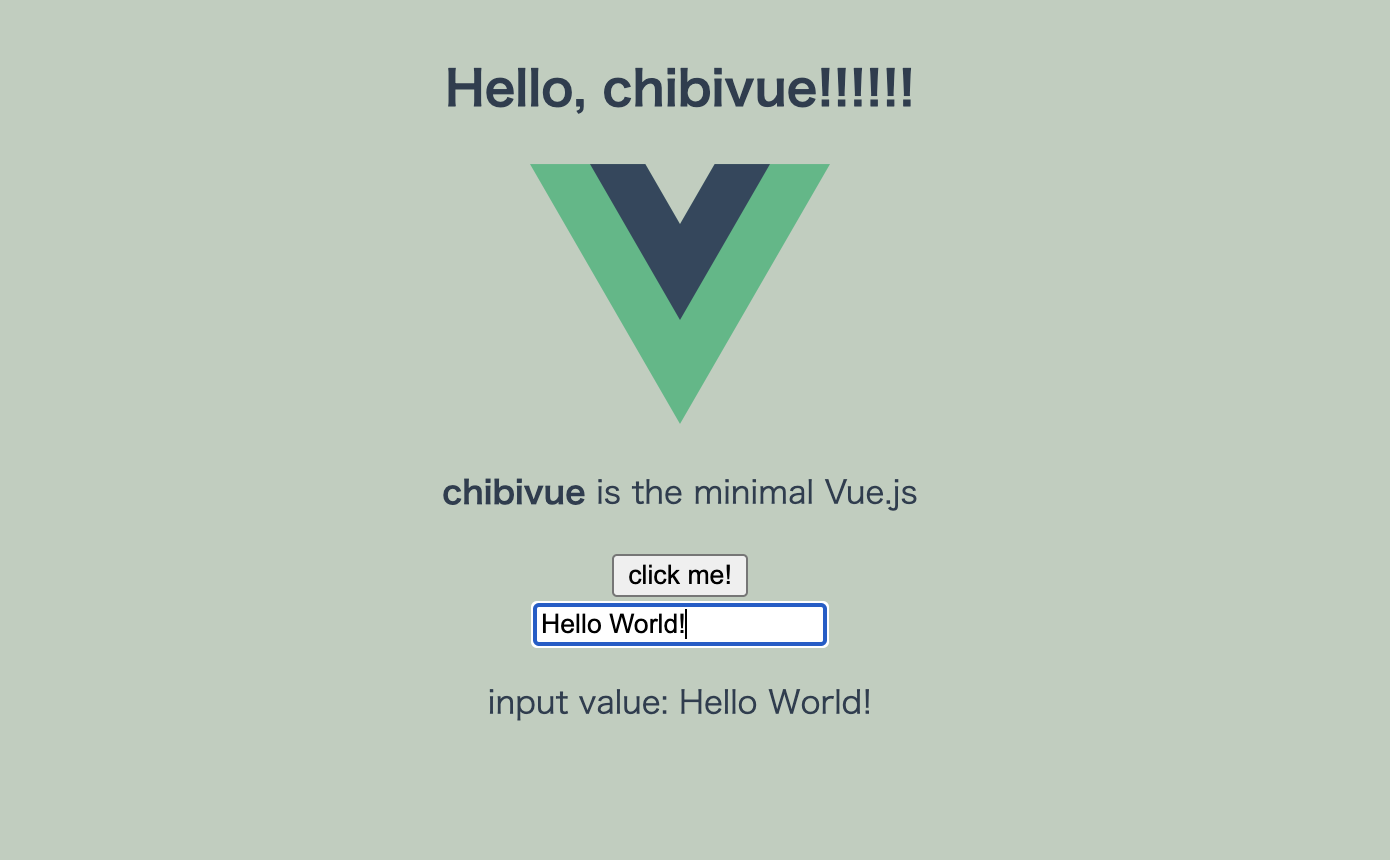
}Now, let's check the operation in the playground.
You should be able to handle not only @click, but also v-on:click and other events.
const app = createApp({
  setup() {
    const state = reactive({ message: 'Hello, chibivue!', input: '' })

    const changeMessage = () => {
      state.message += '!'
    }

    const handleInput = (e: InputEvent) => {
      state.input = (e.target as HTMLInputElement)?.value ?? ''
    }

    return { state, changeMessage, handleInput }
  },

  template: `
    <div class="container" style="text-align: center">
      <h2>{{ state.message }}</h2>
      <img
        width="150px"
        src="https://upload.wikimedia.org/wikipedia/commons/thumb/9/95/Vue.js_Logo_2.svg/1200px-Vue.js_Logo_2.svg.png"
        alt="Vue.js Logo"
      />
      <p><b>chibivue</b> is the minimal Vue.js</p>

      <button @click="changeMessage"> click me! </button>

      <br />

      <label>
        Input Data
        <input @input="handleInput" />
      </label>

      <p>input value: {{ state.input }}</p>

      <style>
        .container {
          height: 100vh;
          padding: 16px;
          background-color: #becdbe;
          color: #2c3e50;
        }
      </style>
    </div>
  `,
})
You did it.
We're getting closer to Vue!
With this, the implementation of the small template is complete. Good job.
Source code up to this point:
chibivue (GitHub)
