データバインディング
テンプレートにバインドしたい
今の状態だと,直接 DOM 操作をしているので,リアクティビティシステムや仮想 DOM の恩恵を得ることができていません.
実際にはイベントハンドラであったり,テキストの内容はテンプレート部分に書きたいわけです.それでこそ宣言的 UI の嬉しさと言った感じですよね.
以下のような開発者インタフェースを目指します.
import { createApp, reactive } from 'chibivue'

const app = createApp({
  setup() {
    const state = reactive({ message: 'Hello, chibivue!' })
    const changeMessage = () => {
      state.message += '!'
    }

    return { state, changeMessage }
  },

  template: `
    <div class="container" style="text-align: center">
      <h2>message: {{ state.message }}</h2>
      <img
        width="150px"
        src="https://upload.wikimedia.org/wikipedia/commons/thumb/9/95/Vue.js_Logo_2.svg/1200px-Vue.js_Logo_2.svg.png"
        alt="Vue.js Logo"
      />
      <p><b>chibivue</b> is the minimal Vue.js</p>

      <button @click="changeMessage"> click me! </button>

      <style>
        .container {
          height: 100vh;
          padding: 16px;
          background-color: #becdbe;
          color: #2c3e50;
        }
      </style>
    </div>
  `,
})

app.mount('#app')
setup から return した値をテンプレートに記述して扱えるようにしたいのですが,このことをこれからは「テンプレートバインディング」であったり,単に「バインディング」という言葉で表現することにします.
バインディングをこれから実装していくわけですがイベントハンドラやマスタッシュ構文を実装する前にやっておきたいことがあります.setup から return した値 と言ったのですが,今 setup の戻り値は undefined または,関数 (レンダー関数)です.
バインディングの実装の準備として,setup からステート等を return できるようにして,それらをコンポーネントのデータとして保持できるようにしておく必要があるようです.
export type ComponentOptions = {
  setup?: (
    props: Record<string, any>,
    ctx: { emit: (event: string, ...args: any[]) => void },
  ) => Function | Record<string, unknown> | void // Record<string, unknown> も返しうるように
  // .
  // .
  // .
}export interface ComponentInternalInstance {
// .
// .
// .
setupState: Data // setup の結果はオブジェクトの場合はここに格納することにする
}export const setupComponent = (instance: ComponentInternalInstance) => {
const { props } = instance.vnode
initProps(instance, props)
const component = instance.type as Component
if (component.setup) {
const setupResult = component.setup(instance.props, {
emit: instance.emit,
}) as InternalRenderFunction
// setupResultの型によって分岐をする
if (typeof setupResult === 'function') {
instance.render = setupResult
} else if (typeof setupResult === 'object' && setupResult !== null) {
instance.setupState = setupResult
} else {
// do nothing
}
}
// .
// .
// .
}伴って,これ以降,setup で定義されるデータのことを setupState と呼ぶことにします.
さて,コンパイラを実装する前に,setupState をどのようにしてテンプレートにバインディングするか方針について考えてみます.
テンプレートを実装する前までは以下のように setupState をバインディングしていました.
const app = createApp({
  setup() {
    const state = reactive({ message: 'hello' })
    return () => h('div', {}, [state.message])
  },
})
まぁ,バインドというより普通に render 関数がクロージャを形成し変数を参照しているだけです.
しかし今回は,イメージ的には setup オプションと render 関数は別のものなので,どうにかして render 関数に setup のデータを渡す必要があります.
const app = createApp({
  setup() {
    const state = reactive({ message: 'hello' })
    return { state }
  },

  // これはrender関数に変換される
  template: '<div>{{ state.message }}</div>',
})
template は h 関数を使った render 関数として compile され,instance.render に突っ込まれるわけなので,イメージ的には以下のようなコードと同等になります.
const app = createApp({
  setup() {
    const state = reactive({ message: 'hello' })
    return { state }
  },

  render() {
    return h('div', {}, [state.message])
  },
})
当然,render 関数内では state という変数は定義されていません.
さて,どのようにして state を参照できるようにすれば良いでしょうか.
with 文
結論から言うと,with 文を使って以下のようにすれば良いです.
const app = createApp({
  setup() {
    const state = reactive({ message: 'hello' })
    return { state }
  },

  render(ctx) {
    with (ctx) {
      return h('div', {}, [state.message])
    }
  },
})
with 文についてあまりよく知らない方も少なくないんじゃないかと思います.
それもそのはず,この機能は非推奨の機能です.
https://developer.mozilla.org/en-US/docs/Web/JavaScript/Reference/Statements/with
MDN によると,
まだ対応しているブラウザーがあるかもしれませんが、すでに関連するウェブ標準から削除されているか、削除の手続き中であるか、互換性のためだけに残されている可能性があります。使用を避け、できれば既存のコードは更新してください。
とのことで,使用を避けるようにとのことです.
今後の Vue.js の実装がどうなるかはわかりませんが,Vue.js 3 では with 文を使っているので,今回は with 文を使って実装していきます.
ここで少し補足なのですが,Vue.js でも,全てが全て with 文で実装されているわけではありません.
SFC で template を扱う際は with 文を使わずに実装されています.
これについては後のチャプターで触れる予定ですが,とりあえずここでは with を使って実装することを考えてみます.
さて,ここで少し with 文の挙動についておさらいです. with 文は,文に対するスコープチェーンを拡張します.
以下のような挙動をとります.
const obj = { a: 1, b: 2 }

with (obj) {
  console.log(a, b) // 1, 2
}
with の引数として,state を持つ親オブジェクトを渡してあげれば,state を参照できるようになります.
今回は,この親オブジェクトとして setupState を扱います.
実際には,setupState だけではなく,props のデータや OptionsApi で定義されたデータにもアクセスできるようになる必要があるのですが,今回は一旦 setupState のデータのみ使える形で良しとします.
(この辺りの実装は最小構成部門では取り上げず,後の部門で取り上げます.)
今回やりたいことをまとめると,以下のようなテンプレートを
<div>
  <p>{{ state.message }}</p>
  <button @click="changeMessage">click me</button>
</div>
以下のような関数にコンパイルして,
_ctx => {
  with (_ctx) {
    return h('div', {}, [
      h('p', {}, [state.message]),
      h('button', { onClick: changeMessage }, ['click me']),
    ])
  }
}
この関数に setupState を渡してあげることです.
const setupState = setup()
render(setupState)
マスタッシュ構文の実装
まずはマスタッシュ構文の実装をしていきます.例によって,AST を考え,パーサの実装してコードジェネレータの実装をしていきます.
今現時点で AST の Node として定義されているのは Element と Text と Attribute 程度です.
新たにマスタッシュ構文を定義したいので,直感的には Mustache のような AST にすることが考えられます.
それにあたるのが Interpolation という Node です.
Interpolation には「内挿」であったり,「挿入」と言った意味合いがあります.
よって,今回扱う AST は次のようなものになります.
export const enum NodeTypes {
  ELEMENT,
  TEXT,
  INTERPOLATION, // 追加

  ATTRIBUTE,
}

export type TemplateChildNode = ElementNode | TextNode | InterpolationNode // InterpolationNodeを追加

export interface InterpolationNode extends Node {
  type: NodeTypes.INTERPOLATION
  content: string // マスタッシュの中に記述された内容 (今回は setup で定義された単一の変数名がここに入る)
}
AST が実装できたので,パースの実装をやっていきます. {{ という文字列を見つけたら Interpolation としてパースします.
function parseChildren(
  context: ParserContext,
  ancestors: ElementNode[]
): TemplateChildNode[] {
  const nodes: TemplateChildNode[] = [];

  while (!isEnd(context, ancestors)) {
    const s = context.source;
    let node: TemplateChildNode | undefined = undefined;

    if (startsWith(s, "{{")) { // ここ
      node = parseInterpolation(context);
    } else if (s[0] === "<") {
      if (/[a-z]/i.test(s[1])) {
        node = parseElement(context, ancestors);
      }
    }
    // .
    // .
    //
}function parseInterpolation(
context: ParserContext,
): InterpolationNode | undefined {
const [open, close] = ['{{', '}}']
const closeIndex = context.source.indexOf(close, open.length)
if (closeIndex === -1) return undefined
const start = getCursor(context)
advanceBy(context, open.length)
const innerStart = getCursor(context)
const innerEnd = getCursor(context)
const rawContentLength = closeIndex - open.length
const rawContent = context.source.slice(0, rawContentLength)
const preTrimContent = parseTextData(context, rawContentLength)
const content = preTrimContent.trim()
const startOffset = preTrimContent.indexOf(content)
if (startOffset > 0) {
advancePositionWithMutation(innerStart, rawContent, startOffset)
}
const endOffset =
rawContentLength - (preTrimContent.length - content.length - startOffset)
advancePositionWithMutation(innerEnd, rawContent, endOffset)
advanceBy(context, close.length)
return {
type: NodeTypes.INTERPOLATION,
content,
loc: getSelection(context, start),
}
}Text 中に {{ が出現することもあるので parseText も少しだけいじります.
function parseText(context: ParserContext): TextNode {
  const endTokens = ['<', '{{'] // {{ が出現したらparseTextは終わり

  let endIndex = context.source.length

  for (let i = 0; i < endTokens.length; i++) {
    const index = context.source.indexOf(endTokens[i], 1)
    if (index !== -1 && endIndex > index) {
      endIndex = index
    }
  }

  const start = getCursor(context)
  const content = parseTextData(context, endIndex)

  return {
    type: NodeTypes.TEXT,
    content,
    loc: getSelection(context, start),
  }
}
これまでパーサを実装してきた方にとっては特に難しいことはないはずです. {{ を探し, }} が来るまで読み進めて AST を生成しています.}} が見つからなかった場合は undefined を返し,parseText への分岐でテキストとしてパースさせています.
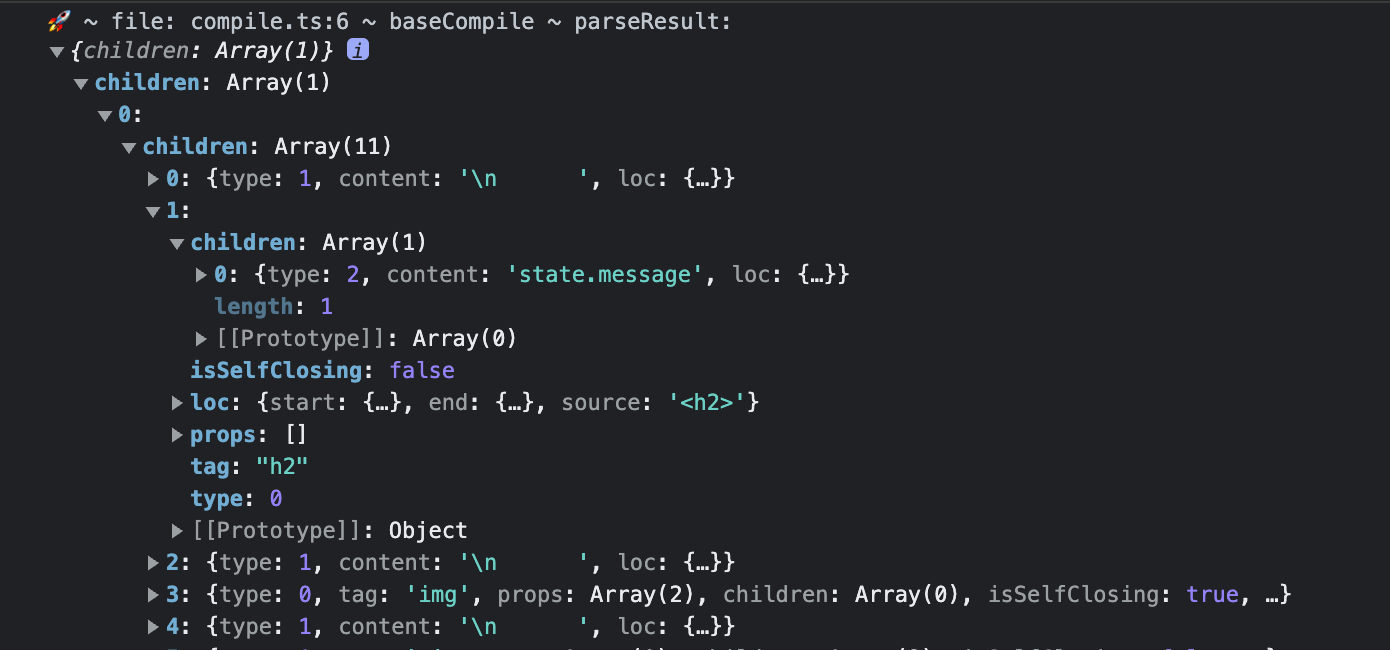
ここらでちゃんとパースができているか,コンソール等に出力して確認してみましょう.
const app = createApp({
  setup() {
    const state = reactive({ message: 'Hello, chibivue!' })
    const changeMessage = () => {
      state.message += '!'
    }

    return { state, changeMessage }
  },
  template: `
    <div class="container" style="text-align: center">
      <h2>{{ state.message }}</h2>
      <img
        width="150px"
        src="https://upload.wikimedia.org/wikipedia/commons/thumb/9/95/Vue.js_Logo_2.svg/1200px-Vue.js_Logo_2.svg.png"
        alt="Vue.js Logo"
      />
      <p><b>chibivue</b> is the minimal Vue.js</p>

      <button> click me! </button>

      <style>
        .container {
          height: 100vh;
          padding: 16px;
          background-color: #becdbe;
          color: #2c3e50;
        }
      </style>
    </div>
  `,
})
問題なさそうです!
さてそれではこの AST を元にバインディングを実装していきましょう.
render 関数の中身を with 文で囲ってあげます.
export const generate = ({
  children,
}: {
  children: TemplateChildNode[]
}): string => {
  return `return function render(_ctx) {
  with (_ctx) {
    const { h } = ChibiVue;
    return ${genNode(children[0])};
  }
}`
}

const genNode = (node: TemplateChildNode): string => {
  switch (node.type) {
    // .
    // .
    case NodeTypes.INTERPOLATION:
      return genInterpolation(node)
    // .
    // .
  }
}

const genInterpolation = (node: InterpolationNode): string => {
  return `${node.content}`
}
あとは,実際に render 関数を実行する際に引数として setupState を渡してあげましょう.
~/packages/runtime-core/component.ts
export type InternalRenderFunction = {
  (ctx: Data): VNodeChild // 引数でctxを受け取れるように
}
~/packages/runtime-core/renderer.ts
const setupRenderEffect = (
  instance: ComponentInternalInstance,
  initialVNode: VNode,
  container: RendererElement,
) => {
  const componentUpdateFn = () => {
    const { render, setupState } = instance
    if (!instance.isMounted) {
      // .
      // .
      // .
      const subTree = (instance.subTree = normalizeVNode(render(setupState))) // setupStateを渡す
      // .
      // .
      // .
    } else {
      // .
      // .
      // .
      const nextTree = normalizeVNode(render(setupState)) // setupStateを渡す
      // .
      // .
      // .
    }
  }
}
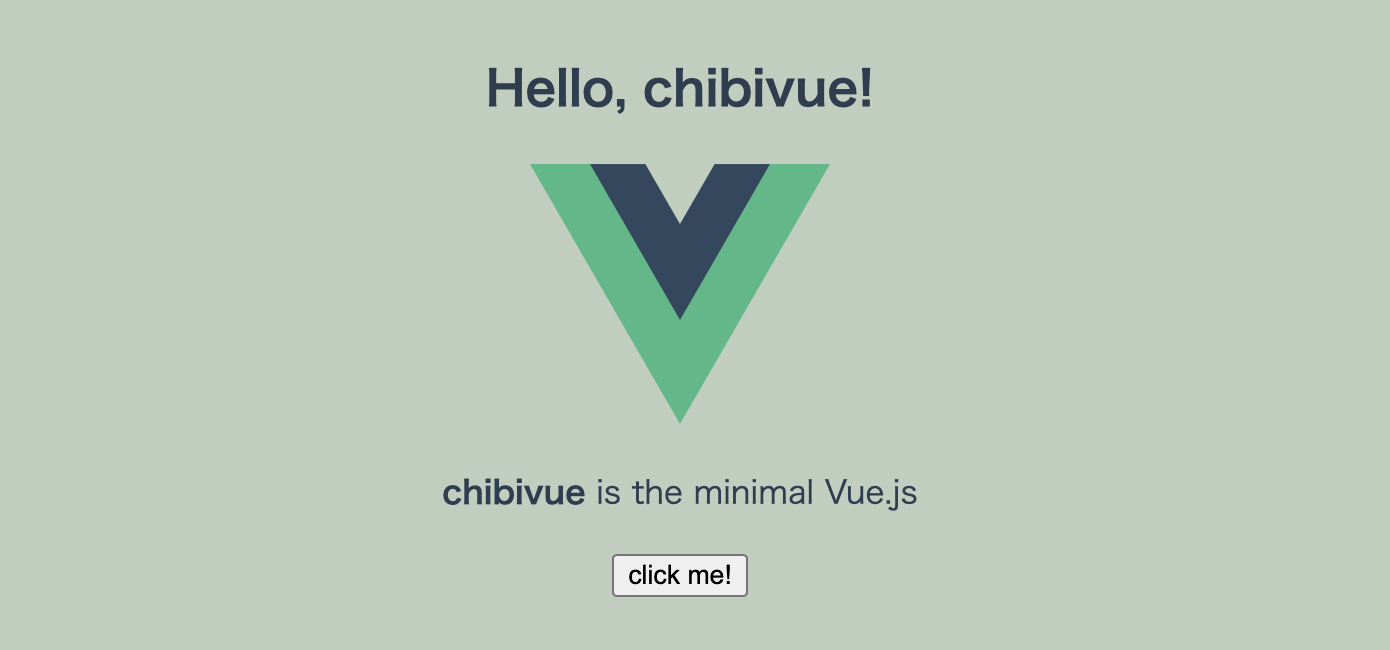
ここまで来ればレンダリングできるようになっているはずです.確認してみましょう!

これにて初めてのバインディング,完です!
初めてのディレクティブ
さて,マスタッシュの次はインベントハンドラです.
const genElement = (el: ElementNode): string => {
  return `h("${el.tag}", {${el.props
    .map(({ name, value }) =>
      // props 名が @click だった場合にonClickに変換する
      name === '@click'
        ? `onClick: ${value?.content}`
        : `${name}: "${value?.content}"`,
    )
    .join(', ')}}, [${el.children.map(it => genNode(it)).join(', ')}])`
}
動作を確認してみましょう.
const app = createApp({
  setup() {
    const state = reactive({ message: 'Hello, chibivue!' })
    const changeMessage = () => {
      state.message += '!'
    }

    return { state, changeMessage }
  },
  template: `
    <div class="container" style="text-align: center">
      <h2>{{ state.message }}</h2>
      <img
        width="150px"
        src="https://upload.wikimedia.org/wikipedia/commons/thumb/9/95/Vue.js_Logo_2.svg/1200px-Vue.js_Logo_2.svg.png"
        alt="Vue.js Logo"
      />
      <p><b>chibivue</b> is the minimal Vue.js</p>

      <button @click="changeMessage"> click me! </button>

      <style>
        .container {
          height: 100vh;
          padding: 16px;
          background-color: #becdbe;
          color: #2c3e50;
        }
      </style>
    </div>
  `,
})
動きましたね! やったね! 完成!
と言いたいところですが,流石に実装が綺麗じゃないのでリファクタしていこうかと思います. @click というものはせっかく,「ディレクティブ」という名前で分類されていて,今後は v-bind や v-model を実装していくことは容易に想像できるかと思いますので,AST 上で DIRECTIVE と表現することにして,単純な ATTRIBUTE と区別するようにしておきましょう.
いつも通り AST -> parse -> codegen の順で実装してみます.
export const enum NodeTypes {
  ELEMENT,
  TEXT,
  INTERPOLATION,

  ATTRIBUTE,
  DIRECTIVE, // 追加
}

export interface ElementNode extends Node {
  type: NodeTypes.ELEMENT
  tag: string
  props: Array<AttributeNode | DirectiveNode> // props は Attribute と DirectiveNode のユニオンの配列にする
  // .
  // .
}

export interface DirectiveNode extends Node {
  type: NodeTypes.DIRECTIVE
  // v-name:arg="exp" というような形式で表すことにする。
  // eg. v-on:click="increment"の場合は { name: "on", arg: "click", exp="increment" }
  name: string
  arg: string
  exp: string
}function parseAttribute(
context: ParserContext,
nameSet: Set<string>
): AttributeNode | DirectiveNode {
// Name.
const start = getCursor(context);
const match = /^[^\t\r\n\f />][^\t\r\n\f />=]*/.exec(context.source)!;
const name = match[0];
nameSet.add(name);
advanceBy(context, name.length);
// Value
let value: AttributeValue = undefined;
if (/^[\t\r\n\f ]*=/.test(context.source)) {
advanceSpaces(context);
advanceBy(context, 1);
advanceSpaces(context);
value = parseAttributeValue(context);
}
// --------------------------------------------------- ここから
// directive
const loc = getSelection(context, start);
if (/^(v-[A-Za-z0-9-]|@)/.test(name)) {
const match =
/(?:^v-([a-z0-9-]+))?(?:(?::|^\.|^@|^#)(\[[^\]]+\]|[^\.]+))?(.+)?$/i.exec(
name
)!;
let dirName = match[1] || (startsWith(name, "@") ? "on" : "");
let arg = "";
if (match[2]) arg = match[2];
return {
type: NodeTypes.DIRECTIVE,
name: dirName,
exp: value?.content ?? "",
loc,
arg,
};
}
// --------------------------------------------------- ここまで
// .
// .
// .const genElement = (el: ElementNode): string => {
return `h("${el.tag}", {${el.props
.map(prop => genProp(prop))
.join(', ')}}, [${el.children.map(it => genNode(it)).join(', ')}])`
}
const genProp = (prop: AttributeNode | DirectiveNode): string => {
switch (prop.type) {
case NodeTypes.ATTRIBUTE:
return `${prop.name}: "${prop.value?.content}"`
case NodeTypes.DIRECTIVE: {
switch (prop.name) {
case 'on':
return `${toHandlerKey(prop.arg)}: ${prop.exp}`
default:
// TODO: other directives
throw new Error(`unexpected directive name. got "${prop.name}"`)
}
}
default:
throw new Error(`unexpected prop type.`)
}
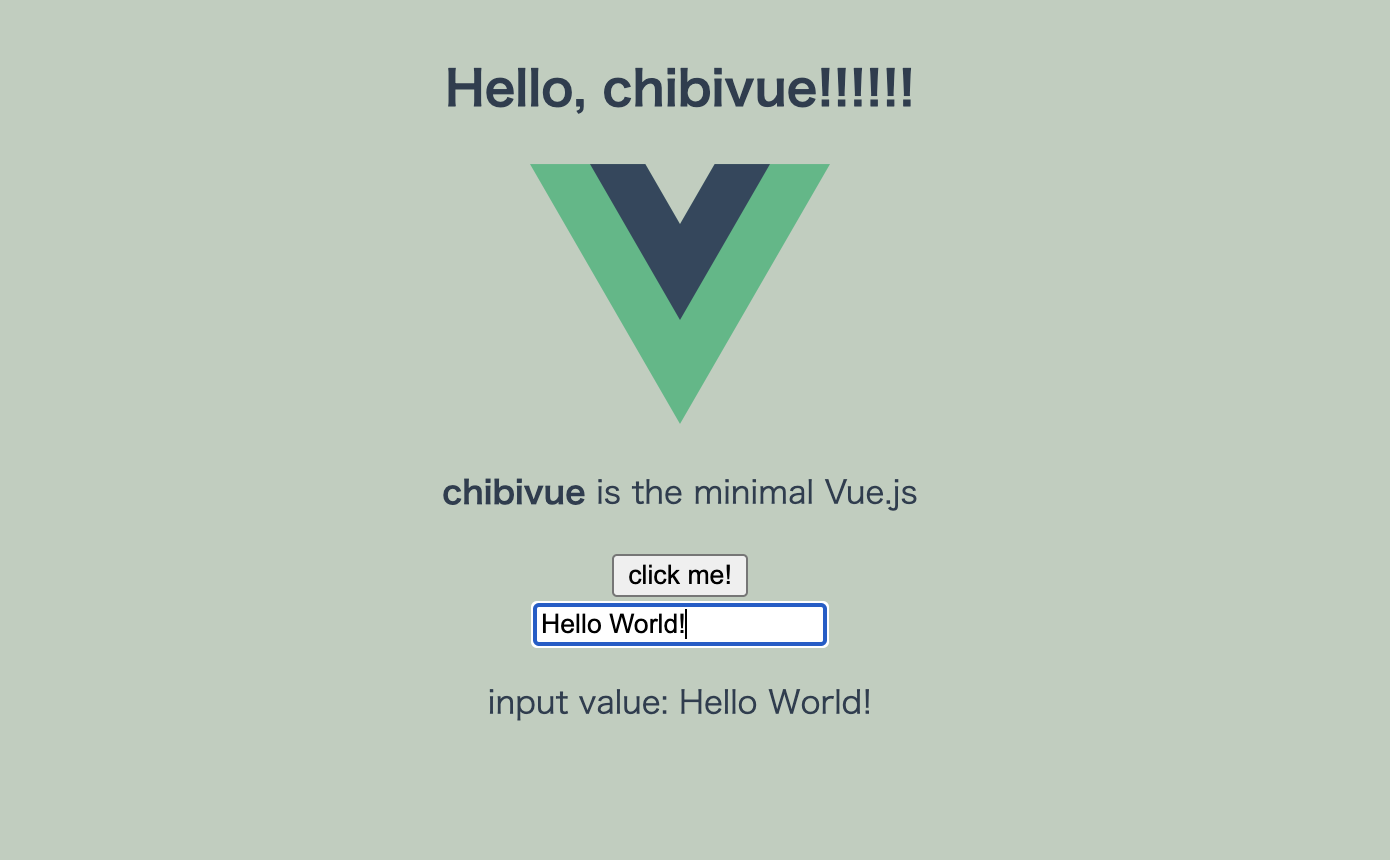
}さて,playground で動作を確認してみましょう. @click のみならず,v-on:click や他のイベントもハンドリングできるようになっているはずです.
const app = createApp({
  setup() {
    const state = reactive({ message: 'Hello, chibivue!', input: '' })

    const changeMessage = () => {
      state.message += '!'
    }

    const handleInput = (e: InputEvent) => {
      state.input = (e.target as HTMLInputElement)?.value ?? ''
    }

    return { state, changeMessage, handleInput }
  },

  template: `
    <div class="container" style="text-align: center">
      <h2>{{ state.message }}</h2>
      <img
        width="150px"
        src="https://upload.wikimedia.org/wikipedia/commons/thumb/9/95/Vue.js_Logo_2.svg/1200px-Vue.js_Logo_2.svg.png"
        alt="Vue.js Logo"
      />
      <p><b>chibivue</b> is the minimal Vue.js</p>

      <button @click="changeMessage"> click me! </button>

      <br />

      <label>
        Input Data
        <input @input="handleInput" />
      </label>

      <p>input value: {{ state.input }}</p>

      <style>
        .container {
          height: 100vh;
          padding: 16px;
          background-color: #becdbe;
          color: #2c3e50;
        }
      </style>
    </div>
  `,
})
やりました.かなり Vue に近づいてきました!
ここまでで小さなテンプレートの実装は完了です.お疲れ様でした.
ここまでのソースコード:
chibivue (GitHub)
