コンポーネントの Proxy と setupContext
コンポーネントの Proxy
コンポーネントが持つ重要な概念として Proxy というものがあります.
これは,簡単にいうと,コンポーネントのインスタンスが持つデータ(public なプロパティ)にアクセスするための Proxy で, この Proxy に setup の結果(ステートや関数),data,props などのアクセスはまとめてしまいます.
以下のようなコードを考えてみましょう.(chibivue で実装していない範囲のものも含みます.普段の Vue だと思ってください)
<script>
export default defineComponent({
  props: { parentCount: { type: Number, default: 0 } },
  data() {
    return { dataState: { count: 0 } }
  },
  methods: {
    incrementData() {
      this.dataState.count++
    },
  },
  setup() {
    const state = reactive({ count: 0 })
    const increment = () => {
      state.count++
    }

    return { state, increment }
  },
})
</script>

<template>
  <div>
    <p>count (parent): {{ parentCount }}</p>

    <br />

    <p>count (data): {{ dataState.count }}</p>
    <button @click="incrementData">increment (data)</button>

    <br />

    <p>count: {{ state.count }}</p>
    <button @click="increment">increment</button>
  </div>
</template>
このコードは正常に動作するわけですが,さて template へはどうやってバインドしているのでしょうか ?
もう一つ例を挙げます.
<script setup>
const ChildRef = ref()

// コンポーネントが持つメソッドやデータにアクセスできる
// ChildRef.value?.incrementData
// ChildRef.value?.increment
</script>

<template>
  <!-- Childは先ほどのコンポーネント -->
  <Child :ref="ChildRef" />
</template>
こちらも,ref を介してコンポーネントの情報にアクセスすることができます.
これをどうやって実現しているかというと,ComponentInternalInstance に proxy というプロパティをもち,ここにはデータアクセスのための Proxy を持っています.
つまり,template (render 関数)や ref は instance.proxy を参照しているということです.
interface ComponentInternalInstance {
  proxy: ComponentPublicInstance | null
}
この proxy の実装はもちろん Proxy で実装されていて,概ね,以下のようなイメージです.
instance.proxy = instance.proxy = new Proxy(
  instance,
  PublicInstanceProxyHandlers,
)

export const PublicInstanceProxyHandlers: ProxyHandler<any> = {
  get(instance: ComponentRenderContext, key: string) {
    const { setupState, ctx, props } = instance

    // key を元に setupState -> props -> ctx の順にチェックして存在していれば値を返す
  },
}
実際にこの Proxy を実装してみましょう!
実装できたら render 関数や ref にはこの proxy を渡すように書き換えてみましょう.
ここまでのソースコード:
chibivue (GitHub)
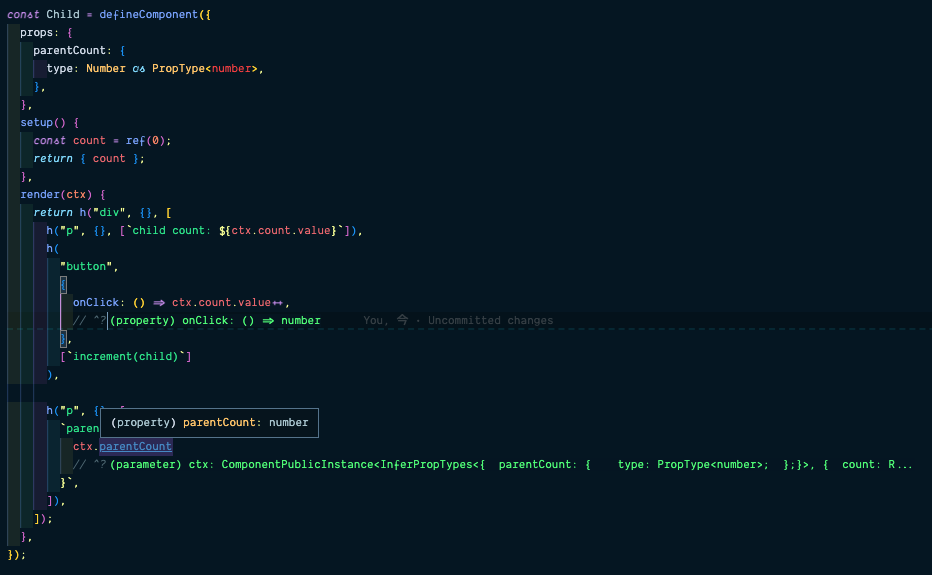
※ ついでに defineComponent の実装とそれに関連する型付も実装しています. (そうすると proxy のデータの型を推論できるようになります.)

setupContext
https://ja.vuejs.org/api/composition-api-setup.html#setup-context
Vue には setupContext という概念があります.これは setup 内に公開される context で,emit や expose などが挙げられます.
現時点では emit は使えるようにはなっているものの,少々雑に実装してしまっています.
const setupResult = component.setup(instance.props, {
  emit: instance.emit,
})
SetupContext というインタフェースをきちんと定義して,インスタンスが持つオブジェクトとして表現しましょう.
export interface ComponentInternalInstance {
  // .
  // .
  // .
  setupContext: SetupContext | null // 追加
}

export type SetupContext = {
  emit: (e: string, ...args: any[]) => void
}
そして,インスタンスを生成する際に setupContext を生成し,setup 関数を実行する際の第二引数にこのオブジェクトを渡すようにしましょう.
expose
ここまでできたら emit 以外の SetupContext も実装してみます.
今回は例として,expose を実装してみます.
expose は,パブリックなプロパティを明示できる関数です.
以下のような開発者インタフェースを目指しましょう.
const Child = defineComponent({
  setup(_, { expose }) {
    const count = ref(0)
    const count2 = ref(0)
    expose({ count })
    return { count, count2 }
  },
  template: `<p>hello</p>`,
})

const Child2 = defineComponent({
  setup() {
    const count = ref(0)
    const count2 = ref(0)
    return { count, count2 }
  },
  template: `<p>hello</p>`,
})

const app = createApp({
  setup() {
    const child = ref()
    const child2 = ref()

    const log = () => {
      console.log(
        child.value.count,
        child.value.count2, // cannot access
        child2.value.count,
        child2.value.count2,
      )
    }

    return () =>
      h('div', {}, [
        h(Child, { ref: child }, []),
        h(Child2, { ref: child2 }, []),
        h('button', { onClick: log }, ['log']),
      ])
  },
})
expose を使用しないコンポーネントでは今まで通り,デフォルトで全てが public です.
方向性としては,インスタンス内に exposed というオブジェクトを持つことにし,ここに値が設定されていれば templateRef に関してはこのオブジェクトを ref に渡す感じです.
export interface ComponentInternalInstance {
  // .
  // .
  // .
  exposed: Record<string, any> | null // 追加
}
そしてここにオブジェクトを登録できるように expose 関数を実装していきましょう.
ProxyRefs
このチャプターで proxy や exposedProxy を実装してきましたが,実は少々本家の Vue とは違う部分があります.
それは,「ref は unwrap される」という点です.(proxy の場合は proxy というより setupState がこの性質を持っています.)
これらは ProxyRefs というプロキシで実装されていて,handler はshallowUnwrapHandlersという名前で実装されています.
これにより,template を記述する際や proxy を扱う際に ref 特有の value の冗長さを排除できるようになっています.
const shallowUnwrapHandlers: ProxyHandler<any> = {
  get: (target, key, receiver) => unref(Reflect.get(target, key, receiver)),
  set: (target, key, value, receiver) => {
    const oldValue = target[key]
    if (isRef(oldValue) && !isRef(value)) {
      oldValue.value = value
      return true
    } else {
      return Reflect.set(target, key, value, receiver)
    }
  },
}<template>
<!-- <p>{{ count.value }}</p> このように書く必要はない -->
<p>{{ count }}</p>
</template>ここまで実装すると以下のようなコードが動くようになるはずです.
import { createApp, defineComponent, h, ref } from 'chibivue'

const Child = defineComponent({
  setup(_, { expose }) {
    const count = ref(0)
    const count2 = ref(0)
    expose({ count })
    return { count, count2 }
  },
  template: `<p>child {{ count }} {{ count2 }}</p>`,
})

const Child2 = defineComponent({
  setup() {
    const count = ref(0)
    const count2 = ref(0)
    return { count, count2 }
  },
  template: `<p>child2 {{ count }} {{ count2 }}</p>`,
})

const app = createApp({
  setup() {
    const child = ref()
    const child2 = ref()

    const increment = () => {
      child.value.count++
      child.value.count2++ // cannot access
      child2.value.count++
      child2.value.count2++
    }

    return () =>
      h('div', {}, [
        h(Child, { ref: child }, []),
        h(Child2, { ref: child2 }, []),
        h('button', { onClick: increment }, ['increment']),
      ])
  },
})

app.mount('#app')
Template へのバインディングと with 文
実は,このチャプターの変更により問題が発生しています.
以下のようなコードを動かしてみましょう.
const Child2 = {
  setup() {
    const state = reactive({ count: 0 })
    return { state }
  },
  template: `<p>child2 count: {{ state.count }}</p>`,
}
なんの変哲もないコードですが,実はこれは動きません.
state が定義されていないと怒られてしまいます.

これがなぜかというと,with 文の引数として Proxy を渡す場合,has を定義しないといけないためです.
Creating dynamic namespaces using the with statement and a proxy (MDN)
というわけで,PublicInstanceProxyHandlers に has を実装してみましょう.
setupState, props, ctx のいずれかに key が存在していれば true を返すようにします.
export const PublicInstanceProxyHandlers: ProxyHandler<any> = {
  // .
  // .
  // .
  has(
    { _: { setupState, ctx, propsOptions } }: ComponentRenderContext,
    key: string,
  ) {
    let normalizedProps
    return (
      hasOwn(setupState, key) ||
      ((normalizedProps = propsOptions[0]) && hasOwn(normalizedProps, key)) ||
      hasOwn(ctx, key)
    )
  },
}
これで正常に動くようになれば OK です!
ここまでのソースコード:
chibivue (GitHub)
