もっと複雑な HTML を書きたい
もっと複雑な HTML を書きたい
今の状態だと,せいぜいタグの名前や属性,テキストの内容くらいしか表すことができていません.
そこで,もっと複雑な HTML を template に書けるようにしたいです. 具体的には,これくらいのテンプレートをコンパイルできるようになりたいです.
const app = createApp({
  template: `
    <div class="container" style="text-align: center">
      <h2>Hello, chibivue!</h2>
      <img
        width="150px"
        src="https://upload.wikimedia.org/wikipedia/commons/thumb/9/95/Vue.js_Logo_2.svg/1200px-Vue.js_Logo_2.svg.png"
        alt="Vue.js Logo"
      />
      <p><b>chibivue</b> is the minimal Vue.js</p>

      <style>
        .container {
          height: 100vh;
          padding: 16px;
          background-color: #becdbe;
          color: #2c3e50;
        }
      </style>
    </div>

  `,
})
app.mount('#app')
しかしこれだけ複雑なものは正規表現でパースするのは厳しいのです.
なので,ここからは本格的にパーサを実装していこうと思います.
AST の導入
本格的なコンパイラを実装していくにあたって AST というものを導入します.
AST は Abstract Syntax Tree (抽象構文木) の略で,名前の通り,構文を表現する木構造のデータ表現です.
これは,Vue.js に限らず,さまざまなコンパイラを実装するときによく登場する概念です.
多くの場合(言語処理系においては),「パース」というと,この AST という表現に変換することを指します.
AST の定義はそれぞれの言語が各自で定義します.
例えば,皆さんが馴染み深いであろう JavaScript は estree という AST で表現されていて,内部的にはソースコードの文字列がこの定義に沿ってパースされていたりします.
と,少しかっこいい感じの説明をしてみましたが,イメージ的にはこれまで実装していた parse 関数の戻り値の型をもっとかっちり形式的に定義するだけです.
今現状だと,parse 関数の戻り値は以下のようになっています.
type ParseResult = {
  tag: string
  props: Record<string, string>
  textContent: string
}
これを拡張して,もっと複雑な表現を行えるような定義にしてみます.
新たに ~/packages/compiler-core/ast.ts を作成します.
少し長いので,コード中に説明を書きながら説明を進めます.
// これは Node の種類を表すものです。
// 注意するべき点としては、ここでいう Node というのは HTML の Node のことではなく、あくまでこのテンプレートコンパイラで扱う粒度であるということです。
// なので、 Element やTextだけでなく Attribute も一つの Node として扱われます。
// これは Vue.js の設計に沿った粒度で、今後、ディレクティブを実装する際などに役に立ちます。
export const enum NodeTypes {
  ELEMENT,
  TEXT,
  ATTRIBUTE,
}

// 全ての Node は type と loc を持っています。
// loc というのは location のことで、この Node がソースコード(テンプレート文字列)のどこに該当するかの情報を保持します。
// (何行目のどこにあるかなど)
export interface Node {
  type: NodeTypes
  loc: SourceLocation
}

// Element の Node です。
export interface ElementNode extends Node {
  type: NodeTypes.ELEMENT
  tag: string // eg. "div"
  props: Array<AttributeNode> // eg. { name: "class", value: { content: "container" } }
  children: TemplateChildNode[]
  isSelfClosing: boolean // eg. <img /> -> true
}

// ElementNode が持つ属性です。
// ただの Record<string, string> と表現してしまってもいいのですが、
// Vue に倣って name(string) と value(TextNode) を持つようにしています。
export interface AttributeNode extends Node {
  type: NodeTypes.ATTRIBUTE
  name: string
  value: TextNode | undefined
}

export type TemplateChildNode = ElementNode | TextNode

export interface TextNode extends Node {
  type: NodeTypes.TEXT
  content: string
}

// location の情報です。 Node はこの情報を持ちます。
// start, end に位置情報が入ります。
// source には実際のコード(文字列)が入ります。
export interface SourceLocation {
  start: Position
  end: Position
  source: string
}

export interface Position {
  offset: number // from start of file
  line: number
  column: number
}
これらが今回扱う AST です.
parse 関数では template の文字列をこの AST に変換するような実装をしていきます.
本格的なパーサの実装
WARNING
2023 年 11 月下旬に vuejs/core で パフォーマンス改善のための大規模なリライト が行われました.
これらは 2023 年 の 12 月末に Vue 3.4 としてリリースされました.
このオンラインブックはそのリライト以前の実装を参考にしていることに注意しくてださい.
然るべきタイミングでこのオンラインブックも追従する予定です.
~/packages/compiler-core/parse.ts に本格的な実装していきます.
本格的と言ってもあまり身構えなくて大丈夫です.やっていることは基本的に文字列を読み進めながら分岐やループを活用して AST を生成しているだけです.
ソースコードが少し多くなりますが,説明もコードベースの方が分かりやすいと思うのでそう進めていきます.
細かい部分はぜひソースコードを読んで把握してみてください.
今実装してある baseParse の内容は一旦消して,戻り値の型も以下のようにします.
import { TemplateChildNode } from './ast'

export const baseParse = (
  content: string,
): { children: TemplateChildNode[] } => {
  // TODO:
  return { children: [] }
}
Context
まずは parse する際に使う状態から実装します.これは ParserContext という名前をつけて,パース中に必要な情報をここにまとめます.
ゆくゆくはパーサーの設定オプションなども保持するようになると思います.
export interface ParserContext {
  // 元々のテンプレート文字列
  readonly originalSource: string

  source: string

  // このパーサが読み取っている現在地
  offset: number
  line: number
  column: number
}

function createParserContext(content: string): ParserContext {
  return {
    originalSource: content,
    source: content,
    column: 1,
    line: 1,
    offset: 0,
  }
}

export const baseParse = (
  content: string,
): { children: TemplateChildNode[] } => {
  const context = createParserContext(content) // contextを生成

  // TODO:
  return { children: [] }
}
parseChildren
順番的には,(parseChildren) -> (parseElement または parseText) とパースを進めていきます.
少し長いですが,parseChildren の実装からです.説明はソースコード中のコメントアウトで行います.
export const baseParse = (
  content: string,
): { children: TemplateChildNode[] } => {
  const context = createParserContext(content)
  const children = parseChildren(context, []) // 子ノードをパースする
  return { children: children }
}

function parseChildren(
  context: ParserContext,

  // HTMLは再起的な構造を持っているので、祖先要素をスタックとして持っておいて、子にネストして行くたびにpushしていきます。
  // endタグを見つけるとparseChildrenが終了してancestorsをpopする感じです。
  ancestors: ElementNode[],
): TemplateChildNode[] {
  const nodes: TemplateChildNode[] = []

  while (!isEnd(context, ancestors)) {
    const s = context.source
    let node: TemplateChildNode | undefined = undefined

    if (s[0] === '<') {
      // sが"<"で始まり、かつ次の文字がアルファベットの場合は要素としてパースします。
      if (/[a-z]/i.test(s[1])) {
        node = parseElement(context, ancestors) // TODO: これから実装します。
      }
    }

    if (!node) {
      // 上記の条件に当てはまらなかった場合はTextNodeとしてパースします。
      node = parseText(context) // TODO: これから実装します。
    }

    pushNode(nodes, node)
  }

  return nodes
}

// 子要素パースの while を判定(パース終了)するための関数
function isEnd(context: ParserContext, ancestors: ElementNode[]): boolean {
  const s = context.source

  // sが"</"で始まり、かつその後にancestorsのタグ名が続くことを判定し、閉じタグがあるか(parseChildrenが終了するべきか)を判定します。
  if (startsWith(s, '</')) {
    for (let i = ancestors.length - 1; i >= 0; --i) {
      if (startsWithEndTagOpen(s, ancestors[i].tag)) {
        return true
      }
    }
  }

  return !s
}

function startsWith(source: string, searchString: string): boolean {
  return source.startsWith(searchString)
}

function pushNode(nodes: TemplateChildNode[], node: TemplateChildNode): void {
  // nodeTypeがTextのものが連続している場合は結合してあげます
  if (node.type === NodeTypes.TEXT) {
    const prev = last(nodes)
    if (prev && prev.type === NodeTypes.TEXT) {
      prev.content += node.content
      return
    }
  }

  nodes.push(node)
}

function last<T>(xs: T[]): T | undefined {
  return xs[xs.length - 1]
}

function startsWithEndTagOpen(source: string, tag: string): boolean {
  return (
    startsWith(source, '</') &&
    source.slice(2, 2 + tag.length).toLowerCase() === tag.toLowerCase() &&
    /[\t\r\n\f />]/.test(source[2 + tag.length] || '>')
  )
}
続いて parseElement と parseText について実装していきます.
isEnd のループについて
isEnd では ancestors の配列のそれぞれの要素に対して startsWithEndTagOpen で s がその要素の閉じタグで始まっている文字列かどうかをループでチェックするような処理になっています.
function isEnd(context: ParserContext, ancestors: ElementNode[]): boolean {
  const s = context.source

  // s が '</' で始まり、かつその後にancestorsのタグ名が続くことを判定し、閉じタグがあるか(parseChildrenが終了するべきか)を判定します。
  if (startsWith(s, '</')) {
    for (let i = ancestors.length - 1; i >= 0; --i) {
      if (startsWithEndTagOpen(s, ancestors[i].tag)) {
        return true
      }
    }
  }

  return !s
}
しかし,s が閉じタグで始まっている文字列かどうかをチェックするのであれば,ancestors の最後の要素に対してのみチェックすれば良いはずです.
parser のリライトによってこのコードは無くなってしまいましたが,リライト前の Vue 3.3 のコードで ancestors の最後の要素に対してのみチェックするようにコードを書き換えても正常系のテストは全て PASS します.
parseText
まずはシンプルな parseText の方から実装していきます.一部,parseText 以外でも使うユーティリティも実装しているので少しだけ長いです.
function parseText(context: ParserContext): TextNode {
  // "<" (タグの開始(開始タグ終了タグ問わず))まで読み進め、何文字読んだかを元にTextデータの終了時点のindexを算出します。
  const endToken = '<'
  let endIndex = context.source.length
  const index = context.source.indexOf(endToken, 1)
  if (index !== -1 && endIndex > index) {
    endIndex = index
  }

  const start = getCursor(context) // これは loc 用

  // endIndexの情報を元に Text データをパースします。
  const content = parseTextData(context, endIndex)

  return {
    type: NodeTypes.TEXT,
    content,
    loc: getSelection(context, start),
  }
}

// content と length を元に text を抽出します。
function parseTextData(context: ParserContext, length: number): string {
  const rawText = context.source.slice(0, length)
  advanceBy(context, length)
  return rawText
}

// -------------------- 以下からはユーティリティです。(parseElementなどでも使う) --------------------

function advanceBy(context: ParserContext, numberOfCharacters: number): void {
  const { source } = context
  advancePositionWithMutation(context, source, numberOfCharacters)
  context.source = source.slice(numberOfCharacters)
}

function advanceSpaces(context: ParserContext): void {
  const match = /^[\t\r\n\f ]+/.exec(context.source);
  if (match) {
    advanceBy(context, match[0].length);
  }
}

// 少し長いですが、やっていることは単純で、 pos の計算を行っています。
// 引数でもらった pos のオブジェクトを破壊的に更新しています。
function advancePositionWithMutation(
  pos: Position,
  source: string,
  numberOfCharacters: number = source.length,
): Position {
  let linesCount = 0
  let lastNewLinePos = -1
  for (let i = 0; i < numberOfCharacters; i++) {
    if (source.charCodeAt(i) === 10 /* newline char code */) {
      linesCount++
      lastNewLinePos = i
    }
  }

  pos.offset += numberOfCharacters
  pos.line += linesCount
  pos.column =
    lastNewLinePos === -1
      ? pos.column + numberOfCharacters
      : numberOfCharacters - lastNewLinePos

  return pos
}

function getCursor(context: ParserContext): Position {
  const { column, line, offset } = context
  return { column, line, offset }
}

function getSelection(
  context: ParserContext,
  start: Position,
  end?: Position,
): SourceLocation {
  end = end || getCursor(context)
  return {
    start,
    end,
    source: context.originalSource.slice(start.offset, end.offset),
  }
}
parseElement
続いて要素のパースです.
要素のパースは主に start タグのパース,子 Node のパース,end タグのパースで成り立っていて,start タグのパースはさらにタグ名,属性に分かれます.
まずは前半の start タグ, 子 Node, end タグをパースするガワを作っていきましょう.
const enum TagType {
  Start,
  End,
}

function parseElement(
  context: ParserContext,
  ancestors: ElementNode[],
): ElementNode | undefined {
  // Start tag.
  const element = parseTag(context, TagType.Start) // TODO:

  // <img /> のような self closing の要素の場合にはここで終了です。( children も end タグもないので)
  if (element.isSelfClosing) {
    return element
  }

  // Children.
  ancestors.push(element)
  const children = parseChildren(context, ancestors)
  ancestors.pop()

  element.children = children

  // End tag.
  if (startsWithEndTagOpen(context.source, element.tag)) {
    parseTag(context, TagType.End) // TODO:
  }

  return element
}
とくに難しいことはないと思います.ここで parseChildren が再帰しています.(parseElement は parseChildren に呼ばれるので)
前後で ancestors というスタック構造のデータを操作しています.
parseTag を実装していきます.
function parseTag(context: ParserContext, type: TagType): ElementNode {
  // Tag open.
  const start = getCursor(context)
  const match = /^<\/?([a-z][^\t\r\n\f />]*)/i.exec(context.source)!
  const tag = match[1]

  advanceBy(context, match[0].length)
  advanceSpaces(context)

  // Attributes.
  let props = parseAttributes(context, type)

  // Tag close.
  let isSelfClosing = false

  // 属性まで読み進めた時点で、次が "/>" だった場合は SelfClosing とする
  isSelfClosing = startsWith(context.source, '/>')
  advanceBy(context, isSelfClosing ? 2 : 1)

  return {
    type: NodeTypes.ELEMENT,
    tag,
    props,
    children: [],
    isSelfClosing,
    loc: getSelection(context, start),
  }
}

// 属性全体(複数属性)のパース
// eg. `id="app" class="container" style="color: red"`
function parseAttributes(
  context: ParserContext,
  type: TagType,
): AttributeNode[] {
  const props = []
  const attributeNames = new Set<string>()

  // タグが終わるまで読み続ける
  while (
    context.source.length > 0 &&
    !startsWith(context.source, '>') &&
    !startsWith(context.source, '/>')
  ) {
    const attr = parseAttribute(context, attributeNames)

    if (type === TagType.Start) {
      props.push(attr)
    }

    advanceSpaces(context) // スペースは読み飛ばす
  }

  return props
}

type AttributeValue =
  | {
      content: string
      loc: SourceLocation
    }
  | undefined

// 属性一つのパース
// eg. `id="app"`
function parseAttribute(
  context: ParserContext,
  nameSet: Set<string>,
): AttributeNode {
  // Name.
  const start = getCursor(context)
  const match = /^[^\t\r\n\f />][^\t\r\n\f />=]*/.exec(context.source)!
  const name = match[0]

  nameSet.add(name)

  advanceBy(context, name.length)

  // Value
  let value: AttributeValue = undefined

  if (/^[\t\r\n\f ]*=/.test(context.source)) {
    advanceSpaces(context)
    advanceBy(context, 1)
    advanceSpaces(context)
    value = parseAttributeValue(context)
  }

  const loc = getSelection(context, start)

  return {
    type: NodeTypes.ATTRIBUTE,
    name,
    value: value && {
      type: NodeTypes.TEXT,
      content: value.content,
      loc: value.loc,
    },
    loc,
  }
}

// 属性のvalueをパース
// valueのクォートはシングルでもダブルでもパースできるように実装しています。
// これも頑張ってクォートで囲まれたvalueを取り出したりしているだけです。
function parseAttributeValue(context: ParserContext): AttributeValue {
  const start = getCursor(context)
  let content: string

  const quote = context.source[0]
  const isQuoted = quote === `"` || quote === `'`
  if (isQuoted) {
    // Quoted value.
    advanceBy(context, 1)

    const endIndex = context.source.indexOf(quote)
    if (endIndex === -1) {
      content = parseTextData(context, context.source.length)
    } else {
      content = parseTextData(context, endIndex)
      advanceBy(context, 1)
    }
  } else {
    // Unquoted
    const match = /^[^\t\r\n\f >]+/.exec(context.source)
    if (!match) {
      return undefined
    }
    content = parseTextData(context, match[0].length)
  }

  return { content, loc: getSelection(context, start) }
}
パーサの実装を終えて
例になくたくさんコードを書いてきました.(せいぜい 300 行ちょっとですが)
ここの実装は特別言葉で説明するよりも読んだ方が理解が進むと思うので,何度か繰り返し読んでみてください.
たくさん書きましたが基本的には文字列を読み進めて解析を進めているだけで,特に難しいテクニックなどはない地道な作業です.
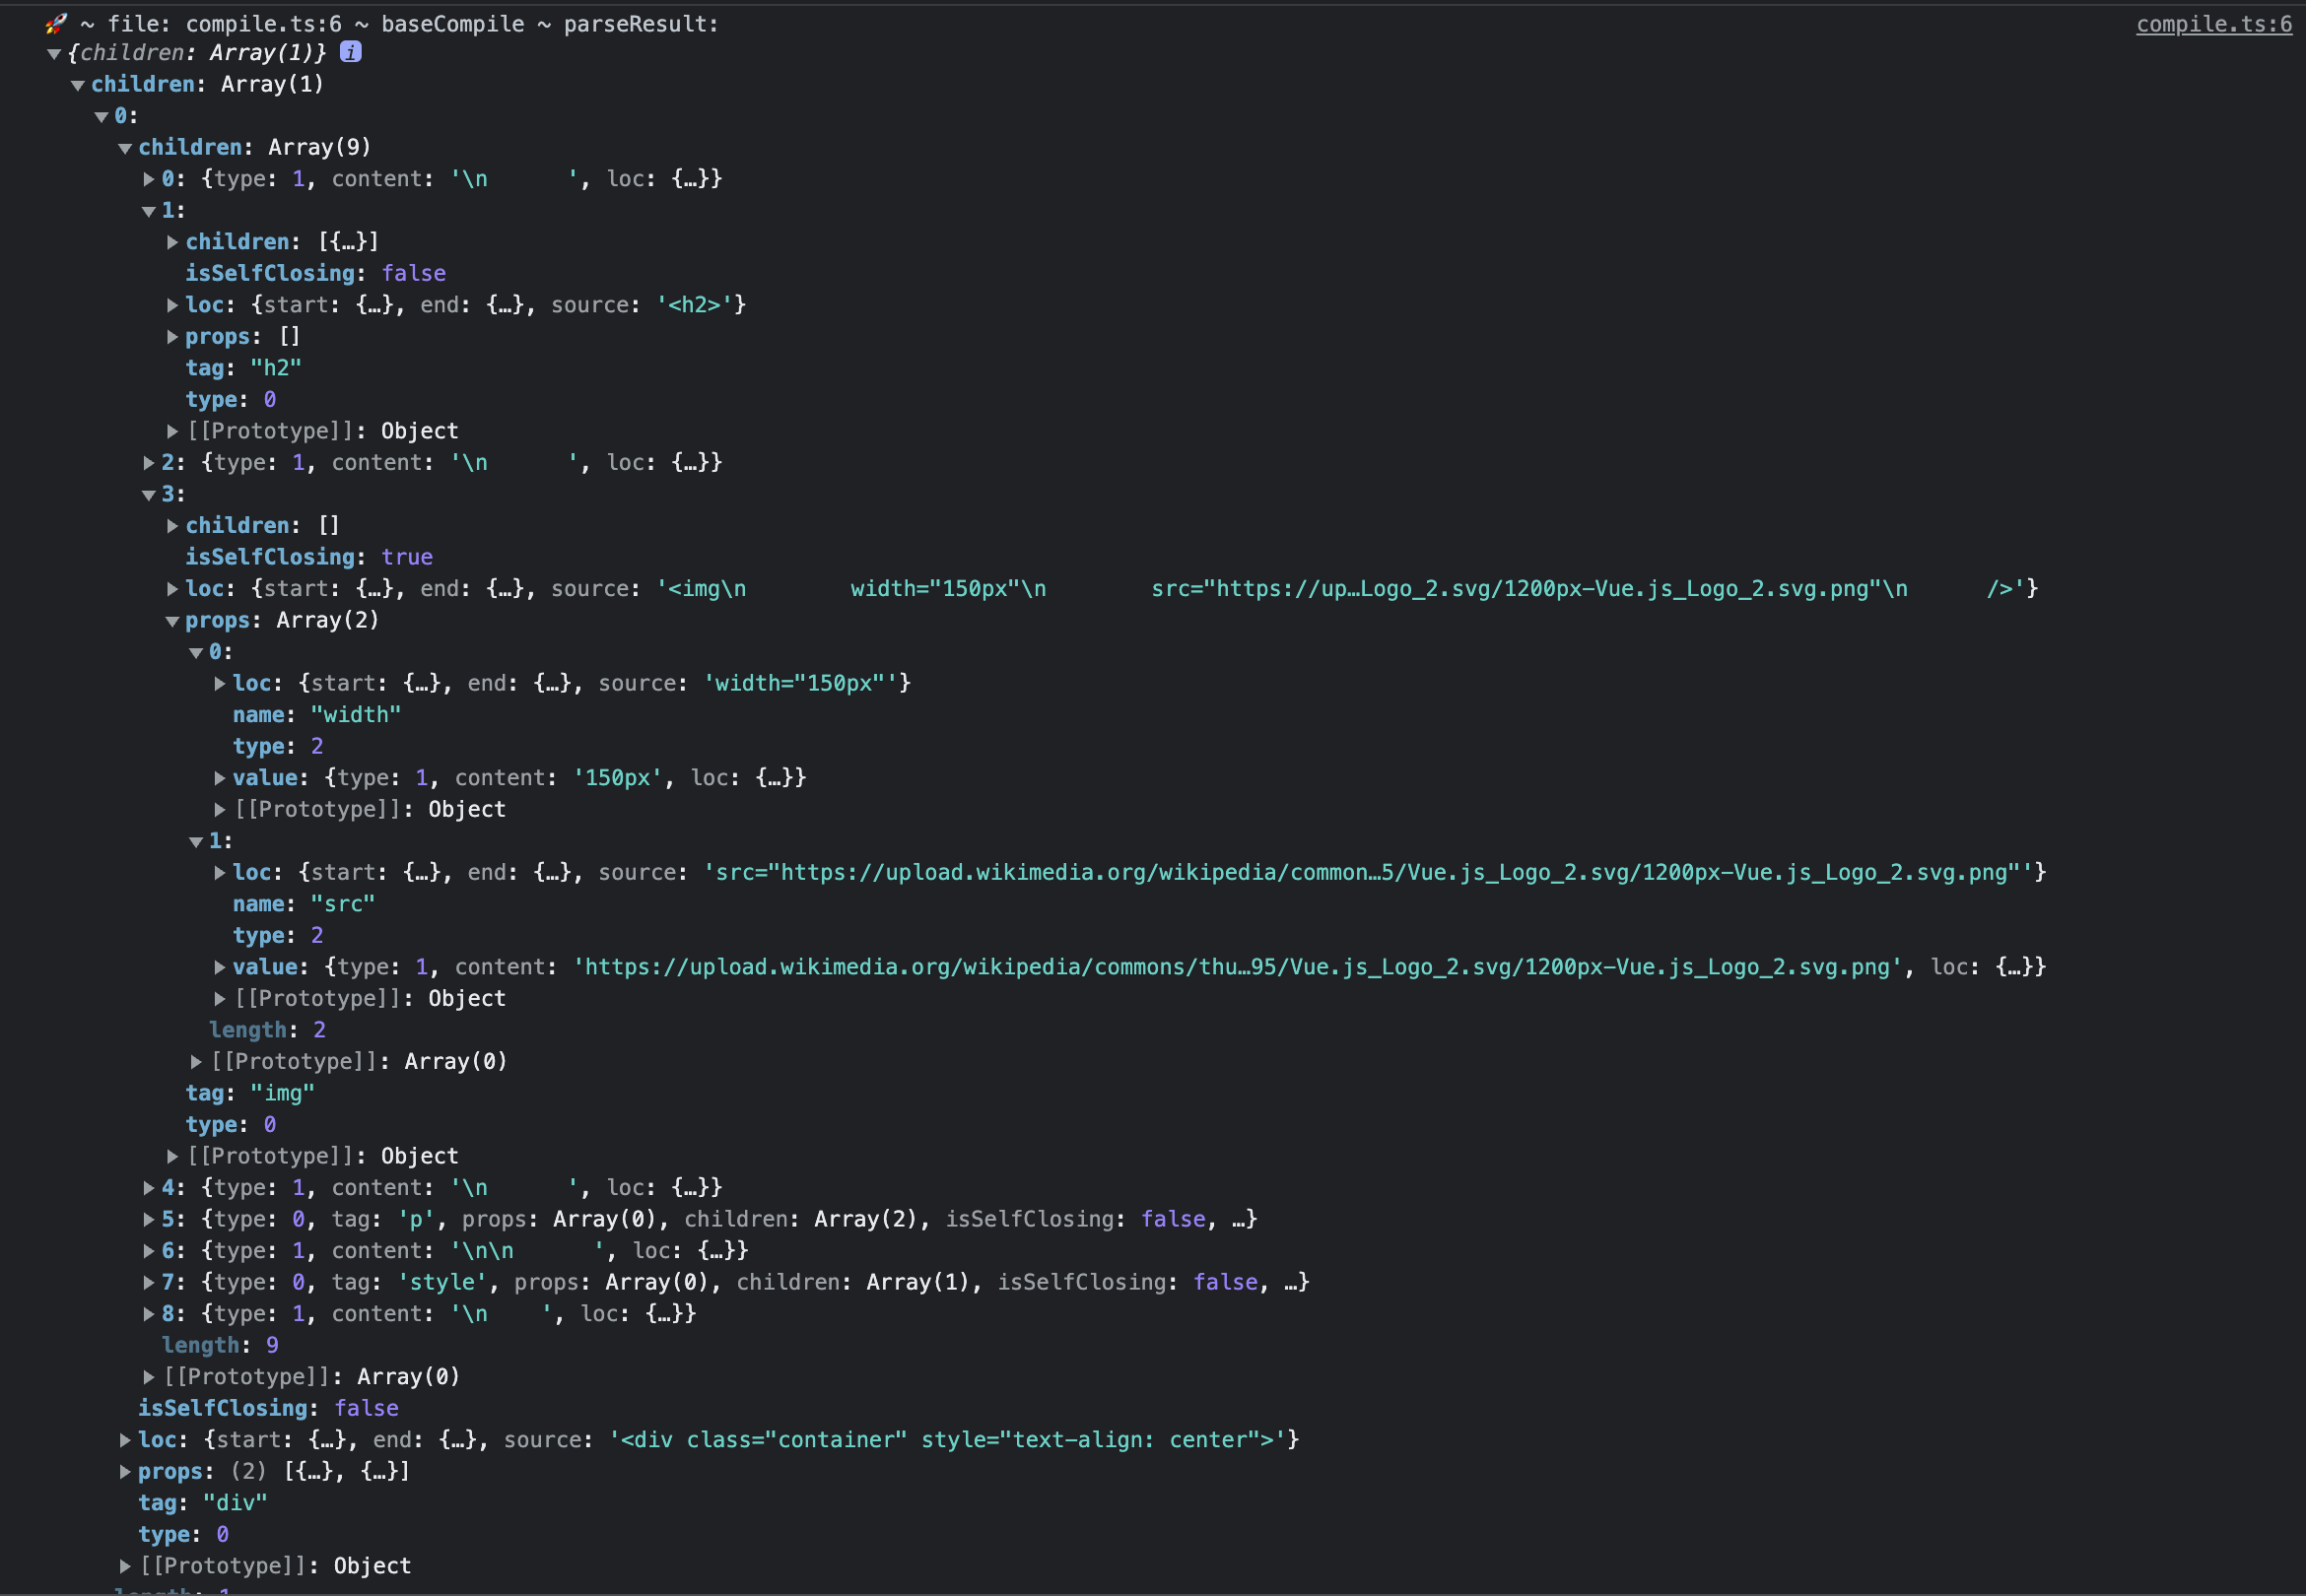
ここまでで AST を生成できるようになっているはずです.パースができているか動作を確認してみましょう.
とはいえ,codegen の部分をまだ実装できていないので,今回に関しては console に出力して確認してみます.
const app = createApp({
  template: `
    <div class="container" style="text-align: center">
      <h2>Hello, chibivue!</h2>
      <img
        width="150px"
        src="https://upload.wikimedia.org/wikipedia/commons/thumb/9/95/Vue.js_Logo_2.svg/1200px-Vue.js_Logo_2.svg.png"
        alt="Vue.js Logo"
      />
      <p><b>chibivue</b> is the minimal Vue.js</p>

      <style>
        .container {
          height: 100vh;
          padding: 16px;
          background-color: #becdbe;
          color: #2c3e50;
        }
      </style>
    </div>
  `,
})
app.mount('#app')
~/packages/compiler-core/compile.ts
export function baseCompile(template: string) {
  const parseResult = baseParse(template.trim()) // templateはトリムしておく
  console.log(
    '🚀 ~ file: compile.ts:6 ~ baseCompile ~ parseResult:',
    parseResult,
  )

  // TODO: codegen
  // const code = generate(parseResult);
  // return code;
  return ''
}
画面は何も表示されなくなってしまいますが,コンソールを確認してみましょう.

いい感じにパースができているようです.
それではここで生成した AST を元に codegen の方の実装を進めていこうと思います.
AST を元に render 関数を生成する
さて,本格的なパーサが実装できたところで次はそれに適応したコードジェネレータを作っていきます.
と言っても今の時点だと複雑な実装は必要ありません.
先にコードをお見せしてしまいます.
import { ElementNode, NodeTypes, TemplateChildNode, TextNode } from './ast'

export const generate = ({
  children,
}: {
  children: TemplateChildNode[]
}): string => {
  return `return function render() {
  const { h } = ChibiVue;
  return ${genNode(children[0])};
}`
}

const genNode = (node: TemplateChildNode): string => {
  switch (node.type) {
    case NodeTypes.ELEMENT:
      return genElement(node)
    case NodeTypes.TEXT:
      return genText(node)
    default:
      return ''
  }
}

const genElement = (el: ElementNode): string => {
  return `h("${el.tag}", {${el.props
    .map(({ name, value }) => `${name}: "${value?.content}"`)
    .join(', ')}}, [${el.children.map(it => genNode(it)).join(', ')}])`
}

const genText = (text: TextNode): string => {
  return `\`${text.content}\``
}
以上で動くようなものは作れます.
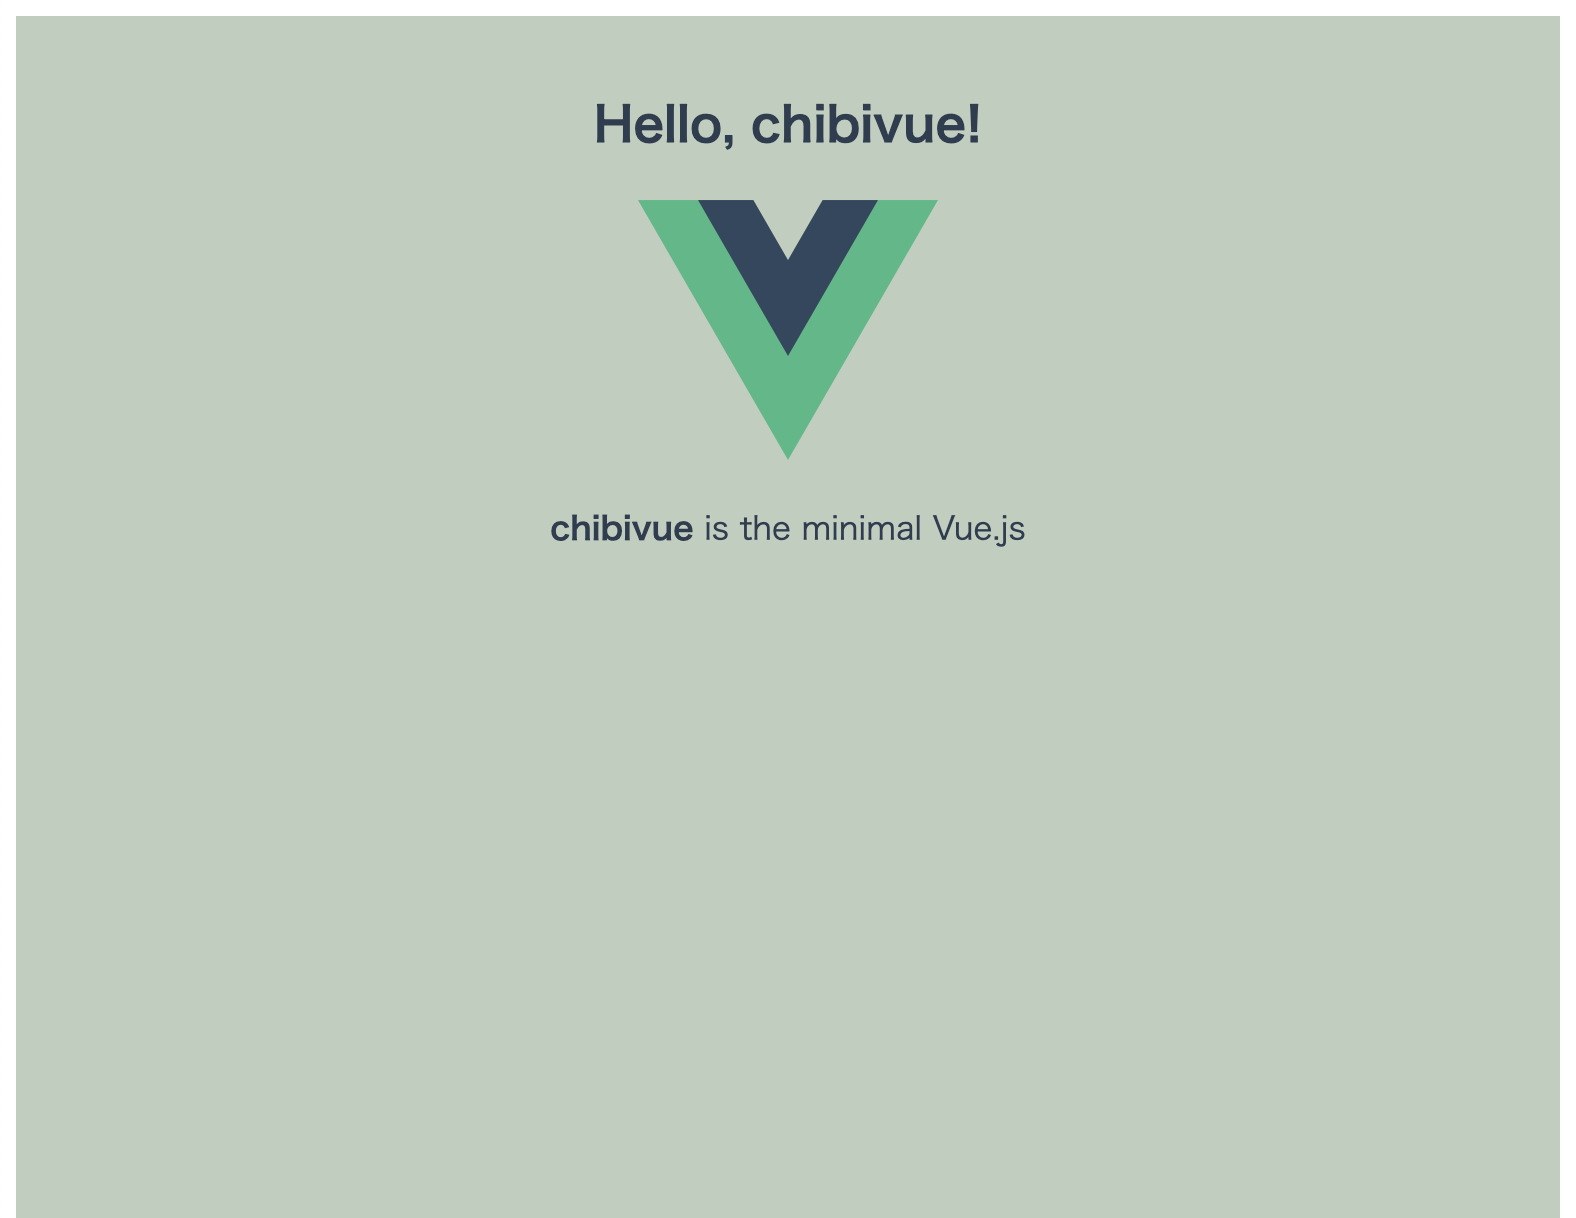
パーサの章でコメントアウトした部分を戻して,実際に動作を見てみましょう.~/packages/compiler-core/compile.ts
export function baseCompile(template: string) {
  const parseResult = baseParse(template.trim())
  const code = generate(parseResult)
  return code
}
playground
import { createApp } from 'chibivue'

const app = createApp({
  template: `
    <div class="container" style="text-align: center">
      <h2>Hello, chibivue!</h2>
      <img
        width="150px"
        src="https://upload.wikimedia.org/wikipedia/commons/thumb/9/95/Vue.js_Logo_2.svg/1200px-Vue.js_Logo_2.svg.png"
        alt="Vue.js Logo"
      />
      <p><b>chibivue</b> is the minimal Vue.js</p>

      <style>
        .container {
          height: 100vh;
          padding: 16px;
          background-color: #becdbe;
          color: #2c3e50;
        }
      </style>
    </div>
  `,
})

app.mount('#app')
どうでしょうか.とってもいいっ感じに画面を描画できているようです.
せっかくなので画面に動きをつけてみます.テンプレートへのバインディングは実装していないので,直接 DOM 操作します.
export type ComponentOptions = {
  // .
  // .
  // .
  setup?: (
    props: Record<string, any>,
    ctx: { emit: (event: string, ...args: any[]) => void },
  ) => Function | void // voidも許可する
  // .
  // .
  // .
}import { createApp } from 'chibivue'
const app = createApp({
setup() {
// マウント後に DOM 操作をしたいので Promise.resolve で処理を遅らせる
Promise.resolve().then(() => {
const btn = document.getElementById('btn')
btn &&
btn.addEventListener('click', () => {
const h2 = document.getElementById('hello')
h2 && (h2.textContent += '!')
})
})
},
template: `
<div class="container" style="text-align: center">
<h2 id="hello">Hello, chibivue!</h2>
<img
width="150px"
src="https://upload.wikimedia.org/wikipedia/commons/thumb/9/95/Vue.js_Logo_2.svg/1200px-Vue.js_Logo_2.svg.png"
alt="Vue.js Logo"
/>
<p><b>chibivue</b> is the minimal Vue.js</p>
<button id="btn"> click me! </button>
<style>
.container {
height: 100vh;
padding: 16px;
background-color: #becdbe;
color: #2c3e50;
}
</style>
</div>
`,
})
app.mount('#app')これで正常に動作していることを確認します.
どうでしょう.機能は少ないにしろ,だんだんと普段の Vue の開発者インタフェースに近づいてきたのではないでしょうか.
ここまでのソースコード:
chibivue (GitHub)
