让我们启用 HTML 元素的渲染
什么是 h 函数?

h 是 hyperscript 的缩写.因为它是一个用 JavaScript 表达 HTML(Hyper Text Markup Language)的函数,所以得名!
到目前为止,我们已经让以下源代码工作:
import { createApp } from 'vue'

const app = createApp({
  render() {
    return 'Hello world.'
  },
})

app.mount('#app')
这是一个简单地在屏幕上渲染"Hello World."的函数.
由于只有一条消息有点孤单,让我们考虑一个也可以渲染 HTML 元素的开发者接口.
这就是 h 函数 的用武之地.这个 h 代表 hyperscript,作为在 JavaScript 中编写 HTML(超文本标记语言)的函数提供.
h() 是 hyperscript 的缩写 - 意思是"产生 HTML(超文本标记语言)的 JavaScript"。这个名称继承自许多虚拟 DOM 实现共享的约定。一个更具描述性的名称可能是 createVnode(),但当您必须在渲染函数中多次调用此函数时,较短的名称会有所帮助。
引用:https://vuejs.org/guide/extras/render-function.html#creating-vnodes
让我们看看 Vue.js 中的 h 函数.
import { createApp, h } from 'vue'

const app = createApp({
  render() {
    return h('div', {}, [
      h('p', {}, ['HelloWorld']),
      h('button', {}, ['click me!']),
    ])
  },
})

app.mount('#app')
作为 h 函数的基本用法,您将标签名称指定为第一个参数,将属性指定为第二个参数,将子元素数组指定为第三个参数.
在这里,我特别提到了"基本用法",因为 h 函数实际上对其参数有多种语法,您可以省略第二个参数或不对子元素使用数组.
但是,在这里我们将以最基本的语法实现它.
我们应该如何实现它?
现在我们了解了开发者接口,让我们决定如何实现它.
需要注意的重要一点是它如何用作渲染函数的返回值.
这意味着 h 函数返回某种对象并在内部使用该结果.
由于复杂的子元素很难理解,让我们考虑实现简单 h 函数的结果.
const result = h('div', { class: 'container' }, ['hello'])result 中应该存储什么样的结果?(我们应该如何格式化结果以及如何渲染它?)
让我们假设以下对象存储在 result 中:
const result = {
  type: 'div',
  props: { class: 'container' },
  children: ['hello'],
}
换句话说,我们将从渲染函数接收类似于上面的对象,并使用它来执行 DOM 操作并渲染它.
图像是这样的(在 createApp 的 mount 内部):
const app: App = {
  mount(rootContainer: HostElement) {
    const node = rootComponent.render!()
    render(node, rootContainer)
  },
}
嗯,唯一改变的是我们将 message 字符串更改为 node 对象.
我们现在要做的就是在渲染函数中基于对象执行 DOM 操作.
实际上,这个对象有一个名字,"虚拟 DOM".
我们将在虚拟 DOM 章节中更多地解释虚拟 DOM,所以现在只需记住这个名字.\
实现 h 函数
首先,创建必要的文件.
pwd # ~
touch packages/runtime-core/vnode.ts
touch packages/runtime-core/h.ts
在 vnode.ts 中定义类型.这就是我们在 vnode.ts 中要做的全部.
export interface VNode {
  type: string
  props: VNodeProps
  children: (VNode | string)[]
}

export interface VNodeProps {
  [key: string]: any
}
接下来,在 h.ts 中实现函数体.
export function h(
  type: string,
  props: VNodeProps,
  children: (VNode | string)[],
) {
  return { type, props, children }
}
现在,让我们尝试在游乐场中使用 h 函数.
import { createApp, h } from 'chibivue'

const app = createApp({
  render() {
    return h('div', {}, ['Hello world.'])
  },
})

app.mount('#app')
屏幕上的显示被破坏了,但如果您在 apiCreateApp 中添加日志,您可以看到它按预期工作.
mount(rootContainer: HostElement) {
  const vnode = rootComponent.render!();
  console.log(vnode); // 检查日志
  render(vnode, rootContainer);
},
现在,让我们实现渲染函数.
在 RendererOptions 中实现 createElement,createText 和 insert.
export interface RendererOptions<HostNode = RendererNode> {
  createElement(type: string): HostNode // 添加

  createText(text: string): HostNode // 添加

  setElementText(node: HostNode, text: string): void

  insert(child: HostNode, parent: HostNode, anchor?: HostNode | null): void // 添加
}
在渲染函数中实现 renderVNode 函数.现在,我们忽略 props.
export function createRenderer(options: RendererOptions) {
  const {
    createElement: hostCreateElement,
    createText: hostCreateText,
    insert: hostInsert,
  } = options

  function renderVNode(vnode: VNode | string) {
    if (typeof vnode === 'string') return hostCreateText(vnode)
    const el = hostCreateElement(vnode.type)

    for (const child of vnode.children) {
      const childEl = renderVNode(child)
      hostInsert(childEl, el)
    }

    return el
  }

  const render: RootRenderFunction = (vnode, container) => {
    const el = renderVNode(vnode)
    hostInsert(el, container)
  }

  return { render }
}
在 runtime-dom 的 nodeOps 中,定义实际的 DOM 操作.
export const nodeOps: RendererOptions<Node> = {
  // 添加
  createElement: tagName => {
    return document.createElement(tagName)
  },

  // 添加
  createText: (text: string) => {
    return document.createTextNode(text)
  },

  setElementText(node, text) {
    node.textContent = text
  },

  // 添加
  insert: (child, parent, anchor) => {
    parent.insertBefore(child, anchor || null)
  },
}
嗯,此时,您应该能够在屏幕上渲染元素.
尝试在游乐场中编写和测试各种东西!
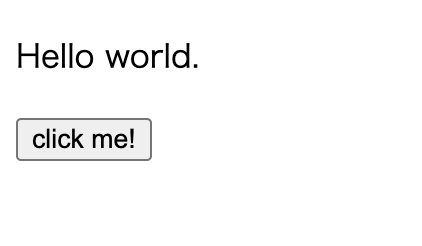
import { createApp, h } from 'chibivue'

const app = createApp({
  render() {
    return h('div', {}, [
      h('p', {}, ['Hello world.']),
      h('button', {}, ['click me!']),
    ])
  },
})

app.mount('#app')
耶!现在我们可以使用 h 函数来渲染各种标签!
到此为止的源代码: chibivue (GitHub)