调度器
调度 Effect
首先,看看这段代码:
import { createApp, h, reactive } from 'chibivue'

const app = createApp({
  setup() {
    const state = reactive({
      message: 'Hello World',
    })
    const updateState = () => {
      state.message = 'Hello ChibiVue!'
      state.message = 'Hello ChibiVue!!'
    }

    return () => {
      console.log('😎 rendered!')

      return h('div', { id: 'app' }, [
        h('p', {}, [`message: ${state.message}`]),
        h('button', { onClick: updateState }, ['update']),
      ])
    }
  },
})

app.mount('#app')当按钮被点击时,state.message 上的 set 函数被调用两次,所以自然地,trigger 函数也会被执行两次.这意味着虚拟 DOM 将被计算两次,补丁也会被执行两次.

然而,实际上,补丁只需要执行一次,在第二次触发时.
因此,我们将实现一个调度器.调度器负责管理任务的执行顺序和控制.Vue 调度器的作用之一是在队列中管理响应式 effect,并在可能的情况下合并它们.
使用队列管理进行调度
具体来说,我们将有一个队列来管理作业.每个作业都有一个 ID,当新作业入队时,如果队列中已经有相同 ID 的作业,它将被覆盖.
export interface SchedulerJob extends Function {
  id?: number
}

const queue: SchedulerJob[] = []

export function queueJob(job: SchedulerJob) {
  if (
    !queue.length ||
    !queue.includes(job, isFlushing ? flushIndex + 1 : flushIndex)
  ) {
    if (job.id == null) {
      queue.push(job)
    } else {
      queue.splice(findInsertionIndex(job.id), 0, job)
    }
    queueFlush()
  }
}
至于作业 ID,在这种情况下,我们希望按组件分组,所以我们将为每个组件分配一个唯一标识符(UID)并将其用作作业 ID.
UID 只是通过递增计数器获得的标识符.
ReactiveEffect 和调度器
目前,ReactiveEffect 具有以下接口(部分省略):
class ReactiveEffect {
  public fn: () => T,

  run() {}
}
随着调度器的实现,让我们做一个小改变.
目前,我们将函数注册到 fn 作为 effect,但这次,让我们将其分为"主动执行的 effect"和"被动执行的 effect".
响应式 effect 可以由设置 effect 的一方主动执行,也可以在被添加到依赖项(dep)后被某些外部操作触发而被动执行.
对于后一种类型的 effect,它被添加到多个 depsMap 并由多个源触发,需要调度(另一方面,如果它被明确主动调用,则不需要这样的调度).
让我们考虑一个具体的例子.在渲染器的 setupRenderEffect 函数中,你可能有以下实现:
const effect = (instance.effect = new ReactiveEffect(() => componentUpdateFn))
const update = (instance.update = () => effect.run())
update()
这里创建的 effect,它是一个 reactiveEffect,稍后在执行 setup 函数时将被响应式对象跟踪.这显然需要调度的实现(因为它将从各个地方被触发).
然而,关于这里调用的 update() 函数,它应该简单地执行 effect,所以不需要调度.
你可能会想,"那我们不能直接调用 componentUpdateFn 吗?"但请记住 run 函数的实现.简单地调用 componentUpdateFn 不会设置 activeEffect.
所以,让我们分离"主动执行的 effect"和"被动执行的 effect(需要调度的 effect)".
作为本章的最终接口,它将如下所示:
// ReactiveEffect 的第一个参数是主动执行的 effect,第二个参数是被动执行的 effect
const effect = (instance.effect = new ReactiveEffect(componentUpdateFn, () =>
  queueJob(update),
))
const update: SchedulerJob = (instance.update = () => effect.run())
update.id = instance.uid
update()
在实现方面,除了 fn 之外,ReactiveEffect 将有一个 scheduler 函数,在 triggerEffect 函数中,如果存在调度器,将首先执行调度器.
export type EffectScheduler = (...args: any[]) => any;

export class ReactiveEffect<T = any> {
  constructor(
    public fn: () => T,
    public scheduler: EffectScheduler | null = null
  );
}function triggerEffect(effect: ReactiveEffect) {
if (effect.scheduler) {
effect.scheduler()
} else {
effect.run() // 如果没有调度器,正常执行 effect
}
}现在,让我们在阅读源代码的同时实现队列管理调度和 effect 分类!
到此为止的源代码:
chibivue (GitHub)
我们需要 nextTick
如果你在实现调度器时阅读了源代码,你可能已经注意到"nextTick"的出现并想知道它是否在这里使用.首先,让我们谈谈这次我们想要实现的任务.请看这段代码:
import { createApp, h, reactive } from 'chibivue'

const app = createApp({
  setup() {
    const state = reactive({
      count: 0,
    })
    const updateState = () => {
      state.count++

      const p = document.getElementById('count-p')
      if (p) {
        console.log('😎 p.textContent', p.textContent)
      }
    }

    return () => {
      return h('div', { id: 'app' }, [
        h('p', { id: 'count-p' }, [`${state.count}`]),
        h('button', { onClick: updateState }, ['update']),
      ])
    }
  },
})

app.mount('#app')
尝试点击这个按钮并查看控制台.
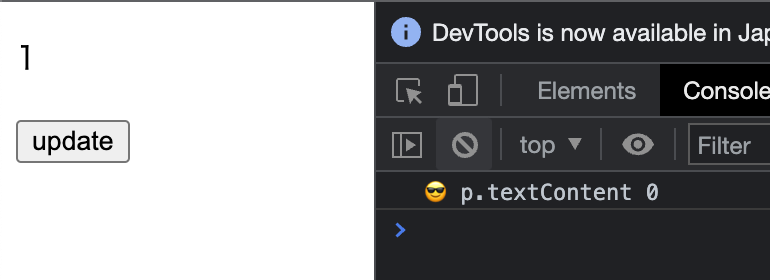
即使我们在更新 state.count 后输出到控制台,信息也是过时的.这是因为当状态更新时,DOM 不会立即更新,在控制台输出时,DOM 仍处于旧状态.
这就是"nextTick"发挥作用的地方.
https://vuejs.org/api/general.html#nexttick
"nextTick"是调度器的一个 API,它允许你等待直到调度器应用 DOM 更改."nextTick"的实现非常简单.它只是保持调度器中正在刷新的作业(promise)并将其连接到"then".
export function nextTick<T = void>(
  this: T,
  fn?: (this: T) => void,
): Promise<void> {
  const p = currentFlushPromise || resolvedPromise
  return fn ? p.then(this ? fn.bind(this) : fn) : p
}
当作业完成时(promise 被解析),传递给"nextTick"的回调被执行.(如果队列中没有作业,它连接到"resolvedPromise"的"then")自然地,"nextTick"本身也返回一个 Promise,所以作为开发者接口,你可以传递回调或 await "nextTick".
import { createApp, h, reactive, nextTick } from 'chibivue'

const app = createApp({
  setup() {
    const state = reactive({
      count: 0,
    })
    const updateState = async () => {
      state.count++

      await nextTick() // 等待
      const p = document.getElementById('count-p')
      if (p) {
        console.log('😎 p.textContent', p.textContent)
      }
    }

    return () => {
      return h('div', { id: 'app' }, [
        h('p', { id: 'count-p' }, [`${state.count}`]),
        h('button', { onClick: updateState }, ['update']),
      ])
    }
  },
})

app.mount('#app')
现在,让我们实际重写当前调度器的实现以保持"currentFlushPromise"并实现"nextTick"!
到此为止的源代码:
chibivue (GitHub)