解析組件
實際上,我們的 chibivue 模板還無法解析組件. 讓我們在這裡實現它,因為 Vue.js 提供了幾種解析組件的方法.
首先,讓我們回顧一些解析方法.
組件的解析方法
1. Components 選項(局部註冊)
這可能是解析組件最簡單的方法.
https://vuejs.org/api/options-misc.html#components
<script>
import MyComponent from './MyComponent.vue'

export default {
  components: {
    MyComponent,
    MyComponent2: MyComponent,
  },
}
</script>

<template>
  <MyComponent />
  <MyComponent2 />
</template>
在 components 選項物件中指定的鍵名成為可以在模板中使用的組件名稱.
2. 在應用程式上註冊(全域註冊)
您可以透過使用建立的 Vue 應用程式的 .component() 方法來註冊可在整個應用程式中使用的組件.
https://vuejs.org/guide/components/registration.html#global-registration
import { createApp } from 'vue'

const app = createApp({})

app
  .component('ComponentA', ComponentA)
  .component('ComponentB', ComponentB)
  .component('ComponentC', ComponentC)
3. 動態組件 + is 屬性
透過使用 is 屬性,您可以動態切換組件.
https://vuejs.org/api/built-in-special-elements.html#component
<script>
import Foo from './Foo.vue'
import Bar from './Bar.vue'

export default {
  components: { Foo, Bar },
  data() {
    return {
      view: 'Foo',
    }
  },
}
</script>

<template>
  <component :is="view" />
</template>
4. 在 script setup 中匯入
在 script setup 中,您可以直接使用匯入的組件.
<script setup>
import MyComponent from './MyComponent.vue'
</script>

<template>
  <MyComponent />
</template>
此外,還有非同步組件,嵌入式組件和 component 標籤,但這次我將嘗試處理上述兩種(1,2).
關於 3,如果 1 和 2 可以處理它,那只是一個擴展.至於 4,由於 script setup 尚未實現,我們將暫時擱置.
基本方法
解析組件的基本方法如下:
- 在某個地方,儲存模板中使用的名稱和組件記錄.
- 使用輔助函式根據名稱解析組件.
形式 1 和形式 2 都只是儲存名稱和組件記錄,唯一的區別是它們註冊的位置.
如果您有記錄,您可以在必要時從名稱解析組件,因此兩種實現都將類似.
首先,讓我們看一下預期的程式碼和編譯結果.
<script>
import MyComponent from './MyComponent.vue'

export default defineComponent({
  components: { MyComponent },
})
</script>

<template>
  <MyComponent />
</template>// 編譯結果
function render(_ctx) {
const {
resolveComponent: _resolveComponent,
createVNode: _createVNode,
Fragment: _Fragment,
} = ChibiVue
const _component_MyComponent = _resolveComponent('MyComponent')
return _createVNode(_Fragment, null, _createVNode(_component_MyComponent))
}看起來是這樣的.
實現
AST
為了產生解析組件的程式碼,我們需要知道"MyComponent"是一個組件.
在解析階段,我們處理標籤名稱並在 AST 上將其分為常規 Element 和 Component.
首先,讓我們考慮 AST 的定義.
ComponentNode 與常規 Element 一樣,具有 props 和 children.
在將這些公共部分合併為 BaseElementNode 的同時,我們將現有的 ElementNode 重新命名為 PlainElementNode,
並使 ElementNode 成為 PlainElementNode 和 ComponentNode 的聯合.
// compiler-core/ast.ts

export const enum ElementTypes {
  ELEMENT,
  COMPONENT,
}

export type ElementNode = PlainElementNode | ComponentNode

export interface BaseElementNode extends Node {
  type: NodeTypes.ELEMENT
  tag: string
  tagType: ElementTypes
  isSelfClosing: boolean
  props: Array<AttributeNode | DirectiveNode>
  children: TemplateChildNode[]
}

export interface PlainElementNode extends BaseElementNode {
  tagType: ElementTypes.ELEMENT
  codegenNode: VNodeCall | SimpleExpressionNode | undefined
}

export interface ComponentNode extends BaseElementNode {
  tagType: ElementTypes.COMPONENT
  codegenNode: VNodeCall | undefined
}
內容與之前相同,但我們透過 tagType 區分它們並將它們視為單獨的 AST.
我們將在轉換階段使用它來新增輔助函式等.
解析器
接下來,讓我們實現解析器來產生上述 AST.
基本上,我們只需要根據標籤名稱確定 tagType.
問題是如何確定它是 Element 還是 Component.
基本思路很簡單:只需確定它是否是"原生標籤".
・
・
・
"等等,等等,這不是我要問的.我們實際上如何實現它?"
是的,這是一種暴力方法.我們預定義原生標籤名稱清單並確定它是否匹配.
至於應該枚舉哪些項目,所有這些都應該寫在規範中,所以我們將信任它並使用它.
如果有問題的話,"什麼是原生標籤"可能因環境而異.
在這種情況下,它是瀏覽器.我的意思是"compiler-core 不應該依賴於環境".
到目前為止,我們已經在 compiler-dom 中實現了這樣的 DOM 依賴實現,這個枚舉也不例外.
考慮到這一點,我們將實現它,以便可以從解析器外部注入"是否為原生標籤"的函式作為選項,考慮到未來的可能性並使其易於在以後新增各種選項.
type OptionalOptions = 'isNativeTag' // | TODO: Add more in the future (maybe)

type MergedParserOptions = Omit<Required<ParserOptions>, OptionalOptions> &
  Pick<ParserOptions, OptionalOptions>

export interface ParserContext {
  // .
  // .
  options: MergedParserOptions
  // .
  // .
}

function createParserContext(
  content: string,
  rawOptions: ParserOptions,
): ParserContext {
  const options = Object.assign({}, defaultParserOptions)

  let key: keyof ParserOptions
  // prettier-ignore
  for (key in rawOptions) {
    options[key] =
      rawOptions[key] === undefined
        ? defaultParserOptions[key]
        : rawOptions[key];
  }

  // .
  // .
  // .
}

export const baseParse = (
  content: string,
  options: ParserOptions = {},
): RootNode => {
  const context = createParserContext(
    content,
    options,
  )
  const children = parseChildren(context, [])
  return createRoot(children)
}
現在,在 compiler-dom 中,我們將枚舉原生標籤名稱並將它們作為選項傳遞.
雖然我提到了 compiler-dom,但枚舉本身是在 shared/domTagConfig.ts 中完成的.
import { makeMap } from './makeMap'

// https://developer.mozilla.org/en-US/docs/Web/HTML/Element
const HTML_TAGS =
  'html,body,base,head,link,meta,style,title,address,article,aside,footer,' +
  'header,hgroup,h1,h2,h3,h4,h5,h6,nav,section,div,dd,dl,dt,figcaption,' +
  'figure,picture,hr,img,li,main,ol,p,pre,ul,a,b,abbr,bdi,bdo,br,cite,code,' +
  'data,dfn,em,i,kbd,mark,q,rp,rt,ruby,s,samp,small,span,strong,sub,sup,' +
  'time,u,var,wbr,area,audio,map,track,video,embed,object,param,source,' +
  'canvas,script,noscript,del,ins,caption,col,colgroup,table,thead,tbody,td,' +
  'th,tr,button,datalist,fieldset,form,input,label,legend,meter,optgroup,' +
  'option,output,progress,select,textarea,details,dialog,menu,' +
  'summary,template,blockquote,iframe,tfoot'

export const isHTMLTag = makeMap(HTML_TAGS)
看起來相當可怕,不是嗎?
但這是正確的實現.
建立 compiler-dom/parserOptions.ts 並將其傳遞給編譯器.
// compiler-dom/parserOptions.ts

import { ParserOptions } from '../compiler-core'
import { isHTMLTag, isSVGTag } from '../shared/domTagConfig'

export const parserOptions: ParserOptions = {
  isNativeTag: tag => isHTMLTag(tag) || isSVGTag(tag),
}export function compile(template: string, option?: CompilerOptions) {
const defaultOption = { isBrowser: true }
if (option) Object.assign(defaultOption, option)
return baseCompile(
template,
Object.assign(
{},
parserOptions,
defaultOption,
{
directiveTransforms: DOMDirectiveTransforms,
},
),
)
}解析器的實現已完成,所以我們現在將繼續實現其餘部分.
其餘部分非常簡單.我們只需要確定它是否是組件並分配一個 tagType.
function parseElement(
  context: ParserContext,
  ancestors: ElementNode[],
): ElementNode | undefined {
  // .
  // .
  let tagType = ElementTypes.ELEMENT
  // prettier-ignore
  if (isComponent(tag, context)) {
    tagType = ElementTypes.COMPONENT;
  }

  return {
    // .
    tagType,
    // .
  }
}

function isComponent(tag: string, context: ParserContext) {
  const options = context.options
  if (
    // NOTE: 在 Vue.js 中,以大寫字母開頭的標籤被視為組件。
    // ref: https://github.com/vuejs/core/blob/32bdc5d1900ceb8df1e8ee33ea65af7b4da61051/packages/compiler-core/src/parse.ts#L662
    /^[A-Z]/.test(tag) ||
    (options.isNativeTag && !options.isNativeTag(tag))
  ) {
    return true
  }
}
有了這個,解析器和 AST 就完成了.我們現在將繼續使用這些來實現轉換和程式碼產生.
轉換
在轉換中需要做的事情非常簡單.
在 transformElement 中,如果 Node 是 ComponentNode,我們只需要進行輕微的轉換.
此時,我們還在上下文中註冊組件. 這樣做是為了我們可以在程式碼產生期間集體解析它. 如後面提到的,組件將在程式碼產生中作為資產集體解析.
// compiler-core/transforms/transformElement.ts
export const transformElement: NodeTransform = (node, context) => {
  return function postTransformElement() {
    // .
    // .

    const isComponent = node.tagType === ElementTypes.COMPONENT

    const vnodeTag = isComponent
      ? resolveComponentType(node as ComponentNode, context)
      : `"${tag}"`

    // .
    // .
  }
}

function resolveComponentType(node: ComponentNode, context: TransformContext) {
  let { tag } = node
  context.helper(RESOLVE_COMPONENT)
  context.components.add(tag) // 稍後解釋
  return toValidAssetId(tag, `component`)
}// util.ts
export function toValidAssetId(
name: string,
type: 'component', // | TODO:
): string {
return `_${type}_${name.replace(/[^\w]/g, (searchValue, replaceValue) => {
return searchValue === '-' ? '_' : name.charCodeAt(replaceValue).toString()
})}`
}我們還確保在上下文中註冊它.
export interface TransformContext extends Required<TransformOptions> {
  // .
  components: Set<string>
  // .
}

export function createTransformContext(
  root: RootNode,
  {
    nodeTransforms = [],
    directiveTransforms = {},
    isBrowser = false,
  }: TransformOptions,
): TransformContext {
  const context: TransformContext = {
    // .
    components: new Set(),
    // .
  }
}
然後,上下文中的所有組件都在目標組件的 RootNode 中註冊.
export interface RootNode extends Node {
  type: NodeTypes.ROOT
  children: TemplateChildNode[]
  codegenNode?: TemplateChildNode | VNodeCall
  helpers: Set<symbol>
  components: string[]
}export function transform(root: RootNode, options: TransformOptions) {
const context = createTransformContext(root, options)
traverseNode(root, context)
createRootCodegen(root, context)
root.helpers = new Set([...context.helpers.keys()])
root.components = [...context.components]
}有了這個,剩下的就是在程式碼產生中使用 RootNode.components.
程式碼產生
程式碼只是透過將名稱傳遞給輔助函式來產生程式碼以進行解析,就像我們在開始時看到的編譯結果一樣.我們將其抽象為"資產"以供將來考慮.
export const generate = (ast: RootNode, option: CompilerOptions): string => {
  // .
  // .
  genFunctionPreamble(ast, context) // NOTE: 將來將此移到函式外部

  // prettier-ignore
  if (ast.components.length) {
    genAssets(ast.components, "component", context);
    newline();
    newline();
  }

  push(`return `)
  // .
  // .
}

function genAssets(
  assets: string[],
  type: 'component' /* TODO: */,
  { helper, push, newline }: CodegenContext,
) {
  if (type === 'component') {
    const resolver = helper(RESOLVE_COMPONENT)
    for (let i = 0; i < assets.length; i++) {
      let id = assets[i]

      push(
        `const ${toValidAssetId(id, type)} = ${resolver}(${JSON.stringify(
          id,
        )})`,
      )
      if (i < assets.length - 1) {
        newline()
      }
    }
  }
}
runtime-core 端的實現
現在我們已經產生了所需的程式碼,讓我們轉到 runtime-core 中的實現.
為組件新增"component"作為選項
這很簡單,只需將其新增到選項中.
export type ComponentOptions<
  // .
  // .
> = {
  // .
  components?: Record<string, Component>
  // .
}
為應用程式新增"components"作為選項
這也很簡單.
export interface AppContext {
  // .
  components: Record<string, Component>
  // .
}

export function createAppContext(): AppContext {
  return {
    // .
    components: {},
    // .
  }
}

export function createAppAPI<HostElement>(
  render: RootRenderFunction<HostElement>,
): CreateAppFunction<HostElement> {
  return function createApp(rootComponent) {
    // .
    const app: App = (context.app = {
      // .
      // prettier-ignore
      component(name: string, component: Component): any {
        context.components[name] = component;
        return app;
      },
    })
  }
}
實現從上述兩者解析組件的函式
這裡沒有什麼特別需要解釋的. 它搜尋本地和全域註冊的組件,並回傳組件. 如果找不到,它將名稱原樣回傳作為回退.
// runtime-core/helpers/componentAssets.ts

export function resolveComponent(name: string): ConcreteComponent | string {
  const instance = currentInstance || currentRenderingInstance // 稍後解釋
  if (instance) {
    const Component = instance.type
    const res =
      // 本地註冊
      resolve((Component as ComponentOptions).components, name) ||
      // 全域註冊
      resolve(instance.appContext.components, name)
    return res
  }

  return name
}

function resolve(registry: Record<string, any> | undefined, name: string) {
  return (
    registry &&
    (registry[name] ||
      registry[camelize(name)] ||
      registry[capitalize(camelize(name))])
  )
}
需要注意的一點是 currentRenderingInstance.
為了在 resolveComponent 中遍歷本地註冊的組件,我們需要存取目前正在渲染的組件. (我們想要搜尋正在渲染的組件的 components 選項)
考慮到這一點,讓我們準備 currentRenderingInstance 並在渲染時更新它.
// runtime-core/componentRenderContexts.ts

export let currentRenderingInstance: ComponentInternalInstance | null = null

export function setCurrentRenderingInstance(
  instance: ComponentInternalInstance | null,
): ComponentInternalInstance | null {
  const prev = currentRenderingInstance
  currentRenderingInstance = instance
  return prev
}// runtime-core/renderer.ts
const setupRenderEffect = (
instance: ComponentInternalInstance,
initialVNode: VNode,
container: RendererElement,
anchor: RendererElement | null,
) => {
const componentUpdateFn = () => {
// .
// .
const prev = setCurrentRenderingInstance(instance)
const subTree = (instance.subTree = normalizeVNode(render(proxy!)))
setCurrentRenderingInstance(prev)
// .
// .
}
// .
// .
}讓我們試試看
太好了!我們終於可以解析組件了.
讓我們嘗試在 playground 中執行它!
import { createApp } from 'chibivue'

import App from './App.vue'
import Counter from './components/Counter.vue'

const app = createApp(App)
app.component('GlobalCounter', Counter)
app.mount('#app')
App.vue
<script>
import Counter from './components/Counter.vue'

import { defineComponent } from 'chibivue'

export default defineComponent({
  components: { Counter },
})
</script>

<template>
  <Counter />
  <Counter />
  <GlobalCounter />
</template>
components/Counter.vue
<script>
import { ref, defineComponent } from 'chibivue'

export default defineComponent({
  setup() {
    const count = ref(0)
    return { count }
  },
})
</script>

<template>
  <button @click="count++">count: {{ count }}</button>
</template>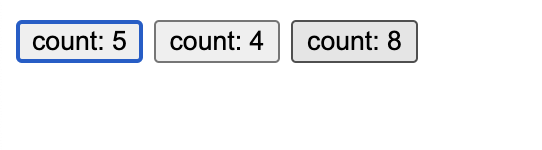
看起來工作正常!太好了!
到此為止的原始碼:GitHub