讓我們實現指令(v-bind)
方法
現在讓我們實現指令,這是 Vue.js 的精髓.
像往常一樣,我們將指令應用到轉換器,出現在那裡的介面稱為 DirectiveTransform.
DirectiveTransform 接受 DirectiveNode 和 ElementNode 作為參數,並返回轉換後的 Property.
export type DirectiveTransform = (
  dir: DirectiveNode,
  node: ElementNode,
  context: TransformContext,
) => DirectiveTransformResult

export interface DirectiveTransformResult {
  props: Property[]
}
首先,讓我們檢查這次我們要實現的開發者介面.
import { createApp, defineComponent } from 'chibivue'

const App = defineComponent({
  setup() {
    const bind = { id: 'some-id', class: 'some-class', style: 'color: red' }
    return { count: 1, bind }
  },

  template: `<div>
  <p v-bind:id="count"> v-bind:id="count" </p>
  <p :id="count * 2"> :id="count * 2" </p>

  <p v-bind:["style"]="bind.style"> v-bind:["style"]="bind.style" </p>
  <p :["style"]="bind.style"> :["style"]="bind.style" </p>

  <p v-bind="bind"> v-bind="bind" </p>

  <p :style="{ 'font-weight': 'bold' }"> :style="{ font-weight: 'bold' }" </p>
  <p :style="'font-weight: bold;'"> :style="'font-weight: bold;'" </p>

  <p :class="'my-class my-class2'"> :class="'my-class my-class2'" </p>
  <p :class="['my-class']"> :class="['my-class']" </p>
  <p :class="{ 'my-class': true }"> :class="{ 'my-class': true }" </p>
  <p :class="{ 'my-class': false }"> :class="{ 'my-class': false }" </p>
</div>`,
})

const app = createApp(App)

app.mount('#app')
v-bind 有各種表示法.詳情請參考官方文件.
我們還將處理 class 和 style.
https://vuejs.org/api/built-in-directives.html#v-bind
AST 修改
首先,讓我們修改 AST.目前,exp 和 arg 都是簡單的字串,所以我們需要將它們更改為接受 ExpressionNode.
export interface DirectiveNode extends Node {
  type: NodeTypes.DIRECTIVE
  name: string
  exp: ExpressionNode | undefined // 這裡
  arg: ExpressionNode | undefined // 這裡
}
讓我再次解釋 name,arg 和 exp.
name 是指令名稱,如 v-bind 或 v-on.它可以是 on 或 bind.
由於我們這次實現 v-bind,它將是 bind.
arg 是由 : 指定的參數.對於 v-bind,它包括 id 和 style.
(在 v-on 的情況下,它包括 click 和 input.)
exp 是右側.在 v-bind:id="count" 的情況下,包含 count.
exp 和 arg 都可以動態嵌入變數,所以它們的類型是 ExpressionNode.
(因為 arg 也可以像 v-bind:[key]="count" 一樣是動態的)

解析器修改
我們將更新解析器實現以遵循這個 AST 修改.我們將 exp 和 arg 解析為 SimpleExpressionNode.
我們還將解析 v-on 中使用的 @ 和插槽中使用的 #.
(由於考慮正規表達式很麻煩(而且在解釋時逐漸添加它們很麻煩),我們現在將借用原始程式碼.)
參考:https://github.com/vuejs/core/blob/623ba514ec0f5adc897db90c0f986b1b6905e014/packages/compiler-core/src/parse.ts#L802
由於程式碼有點長,我將在程式碼中寫註釋來解釋.
function parseAttribute(
  context: ParserContext,
  nameSet: Set<string>,
): AttributeNode | DirectiveNode {
  // .
  // .
  // .
  // .
  // directive
  const loc = getSelection(context, start)
  // 這裡的正規表達式是從原始原始碼借用的
  if (/^(v-[A-Za-z0-9-]|:|\.|@|#)/.test(name)) {
    const match =
      // 這裡的正規表達式是從原始原始碼借用的
      /(?:^v-([a-z0-9-]+))?(?:(?::|^\.|^@|^#)(\[[^\]]+\]|[^\.]+))?(.+)?$/i.exec(
        name,
      )!

    // 檢查名稱部分的匹配,如果以 ":" 開頭則將其視為 "bind"
    let dirName =
      match[1] ||
      (startsWith(name, ':') ? 'bind' : startsWith(name, '@') ? 'on' : '')

    let arg: ExpressionNode | undefined

    if (match[2]) {
      const startOffset = name.lastIndexOf(match[2])
      const loc = getSelection(
        context,
        getNewPosition(context, start, startOffset),
        getNewPosition(context, start, startOffset + match[2].length),
      )

      let content = match[2]
      let isStatic = true

      // 如果是像 "[arg]" 這樣的動態參數,將 isStatic 設置為 false 並提取內容作為內容
      if (content.startsWith('[')) {
        isStatic = false
        if (!content.endsWith(']')) {
          console.error(`Invalid dynamic argument expression: ${content}`)
          content = content.slice(1)
        } else {
          content = content.slice(1, content.length - 1)
        }
      }

      arg = {
        type: NodeTypes.SIMPLE_EXPRESSION,
        content,
        isStatic,
        loc,
      }
    }

    return {
      type: NodeTypes.DIRECTIVE,
      name: dirName,
      exp: value && {
        type: NodeTypes.SIMPLE_EXPRESSION,
        content: value.content,
        isStatic: false,
        loc: value.loc,
      },
      loc,
      arg,
    }
  }
}
透過這樣,我們能夠解析這次想要處理的 AST Node.
轉換器的實現
接下來,讓我們編寫將此 AST 轉換為 Codegen AST 的實現.
由於它有點複雜,我在下圖中總結了流程.請先看一下.
一般來說,必要的項目是 v-bind 是否有參數,是否是 class 或 style.
※ 省略了這次不涉及的處理部分.(請注意這個圖不是很嚴格.)

首先,作為前提,由於指令基本上是為元素宣告的,
與指令相關的轉換器從 transformElement 呼叫.
由於我們這次想要實現 v-bind,我們將實現一個名為 transformVBind 的函式,
但需要注意的一點是,這個函式只轉換具有 args 的宣告.
transformVBind 的作用是將
v-bind:id="count"轉換為像這樣的物件(實際上是表示此物件的 Codegen Node)
{
  id: count
}
在原始實現中也給出了以下解釋.
codegen for the entire props object. This transform here is only for v-bind with args.
正如你從流程中可以看到的,transformElement 檢查指令的 arg,如果它不存在,它不執行 transformVBind,而是將其轉換為對 mergeProps 的函式呼叫.
<p v-bind="bindingObject" class="my-class">hello</p>↓
h('p', mergeProps(bindingObject, { class: 'my-class' }), 'hello')另外,對於 class 和 style,它們有各種開發者介面,所以需要進行規範化.
https://vuejs.org/api/built-in-directives.html#v-bind
實現名為 normalizeClass 和 normalizeStyle 的函式,並分別應用它們.
如果 arg 是動態的,無法確定具體的,所以實現一個名為 normalizeProps 的函式並呼叫它.(它在內部呼叫 normalizeClass 和 normalizeStyle)
現在我們已經實現到這裡,讓我們看看它是如何工作的!
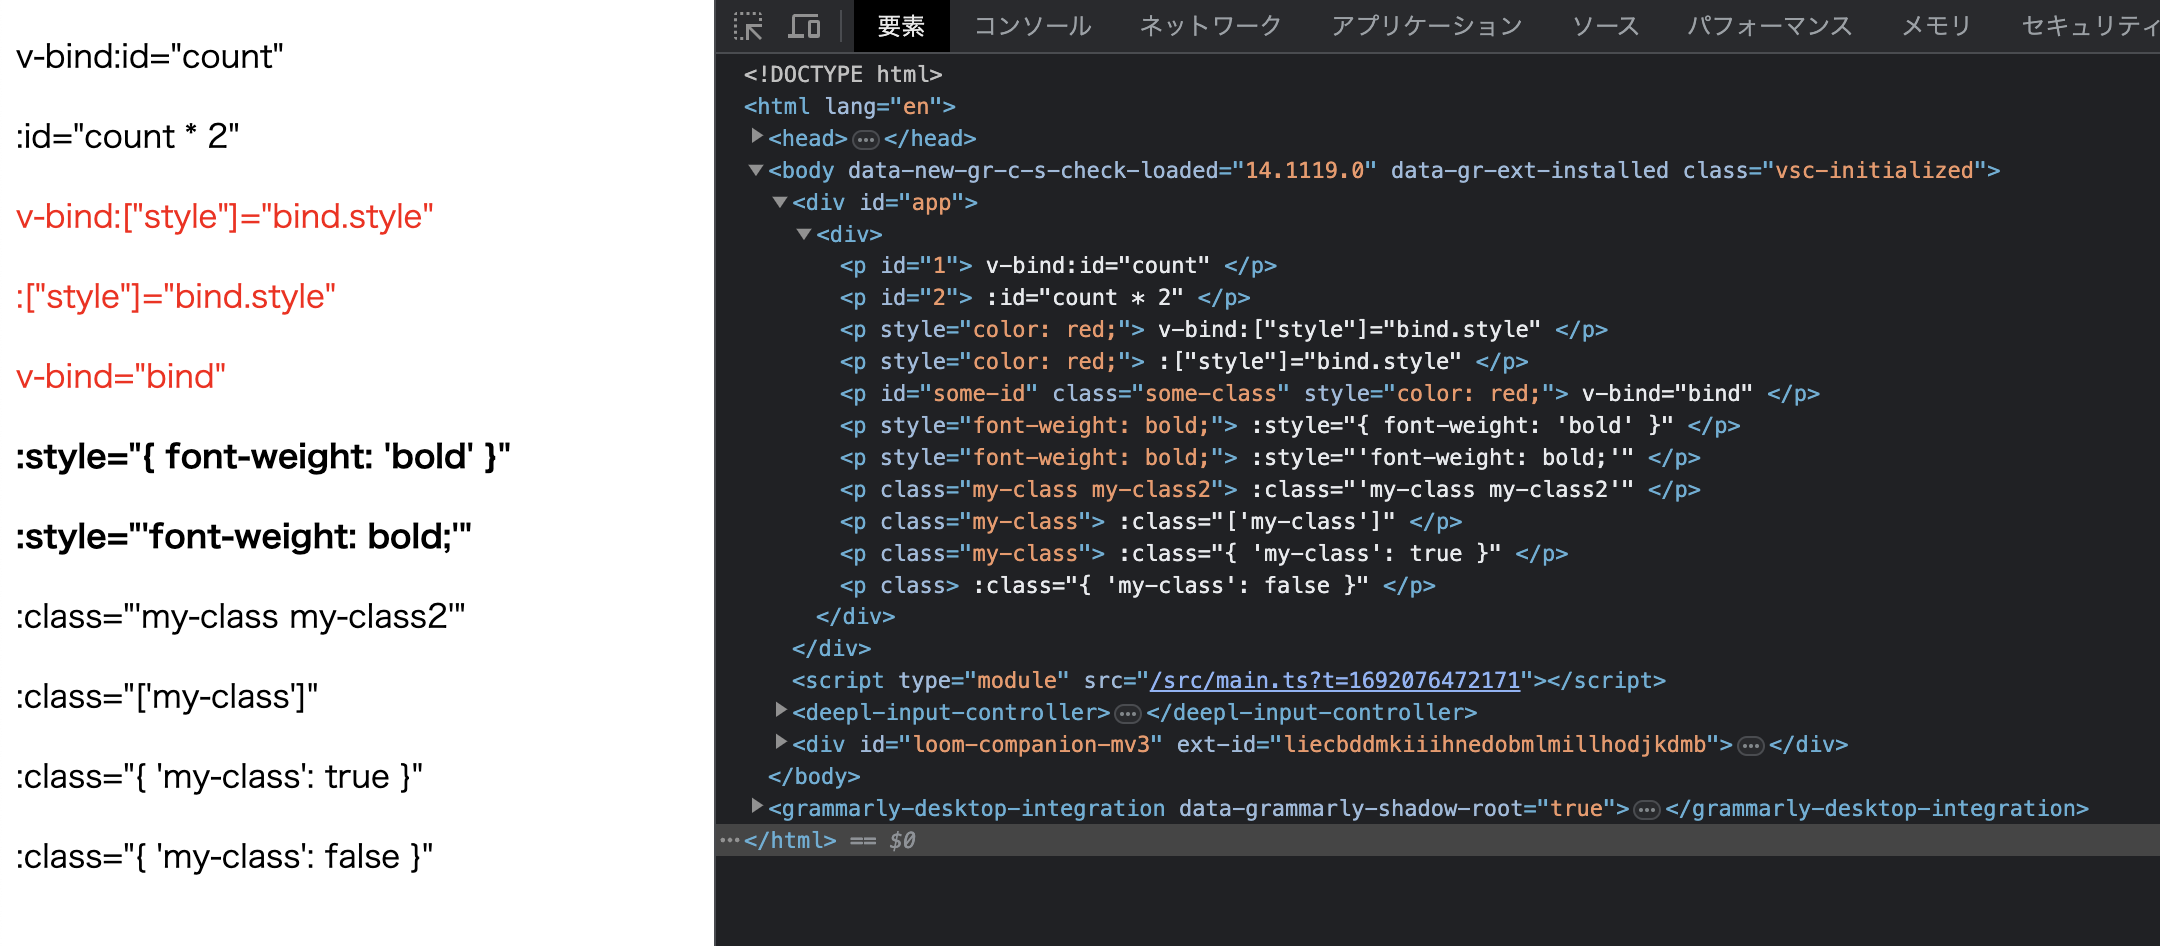
看起來很棒!
下次,我們將實現 v-on.
到此為止的原始碼:
GitHub